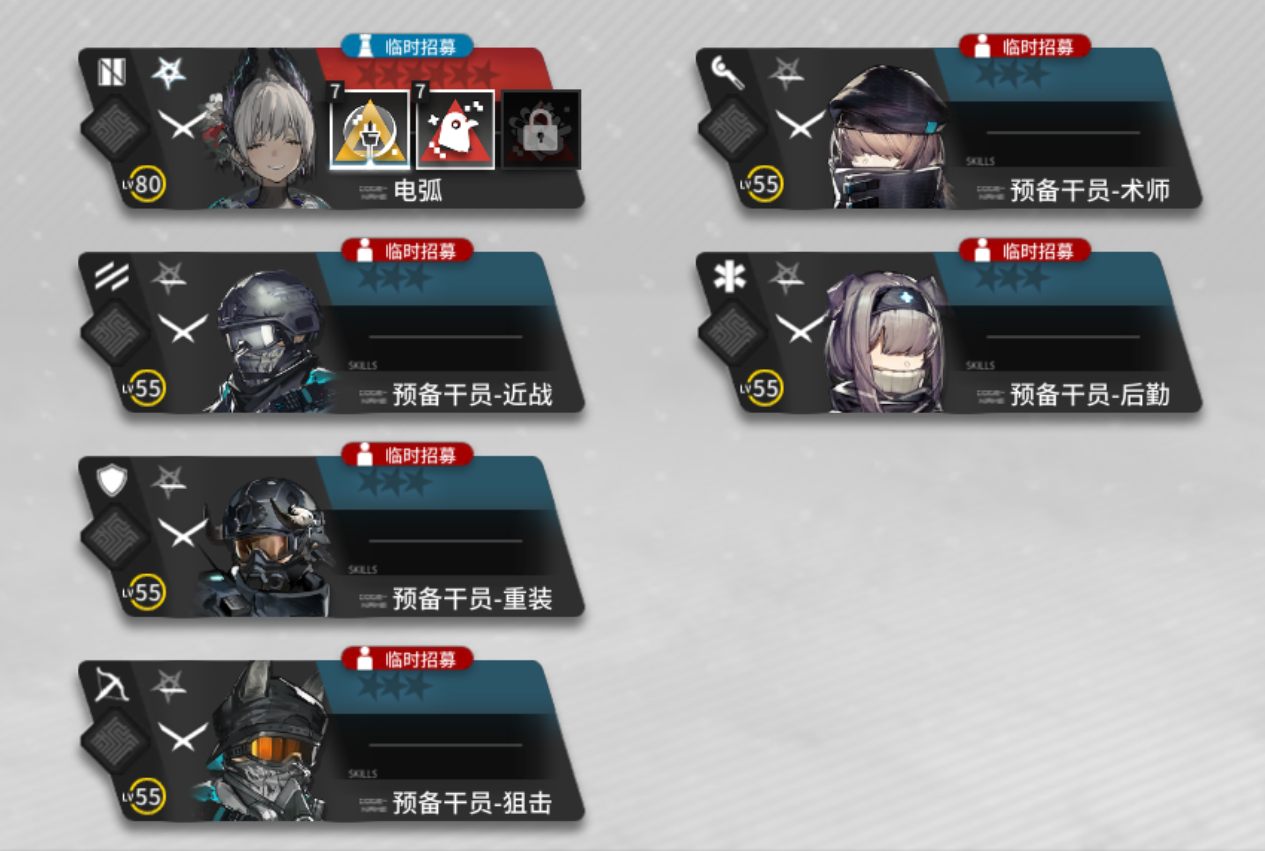
IS6 Progression Guide
With the release of the 6th iteration of Integrated Strategies (IS6), Sui’s Garden of Grotesqueries, right around the corner, it is vital to understand how to navigate the garden. This guide’s primary focus is to help readers reach Difficulty 10+ and complete every Raidian mission along the way. Welcome, and enjoy your stay, tourists!
Getting Started
Section titled “Getting Started”
Your absolute top priority in IS6 is to acquire and build Raidian. She is the welfare operator exclusive to this mode. As you progress through her unique talent tree, she provides incredible combat power and out-of-stage benefits.
How to unlock her: Raidian is the very first reward on the IS6 Reward Track. Simply enter the mode, play a few stages, and you will unlock her naturally.
- Potentials: You receive Raidian’s potentials starting at Level 30 of the track, and every 5th level thereafter. You can max her potential immediately upon the theme’s release, as the initial level cap goes up to 50.
Here are some new mechanics that you should know before attempting your first run:
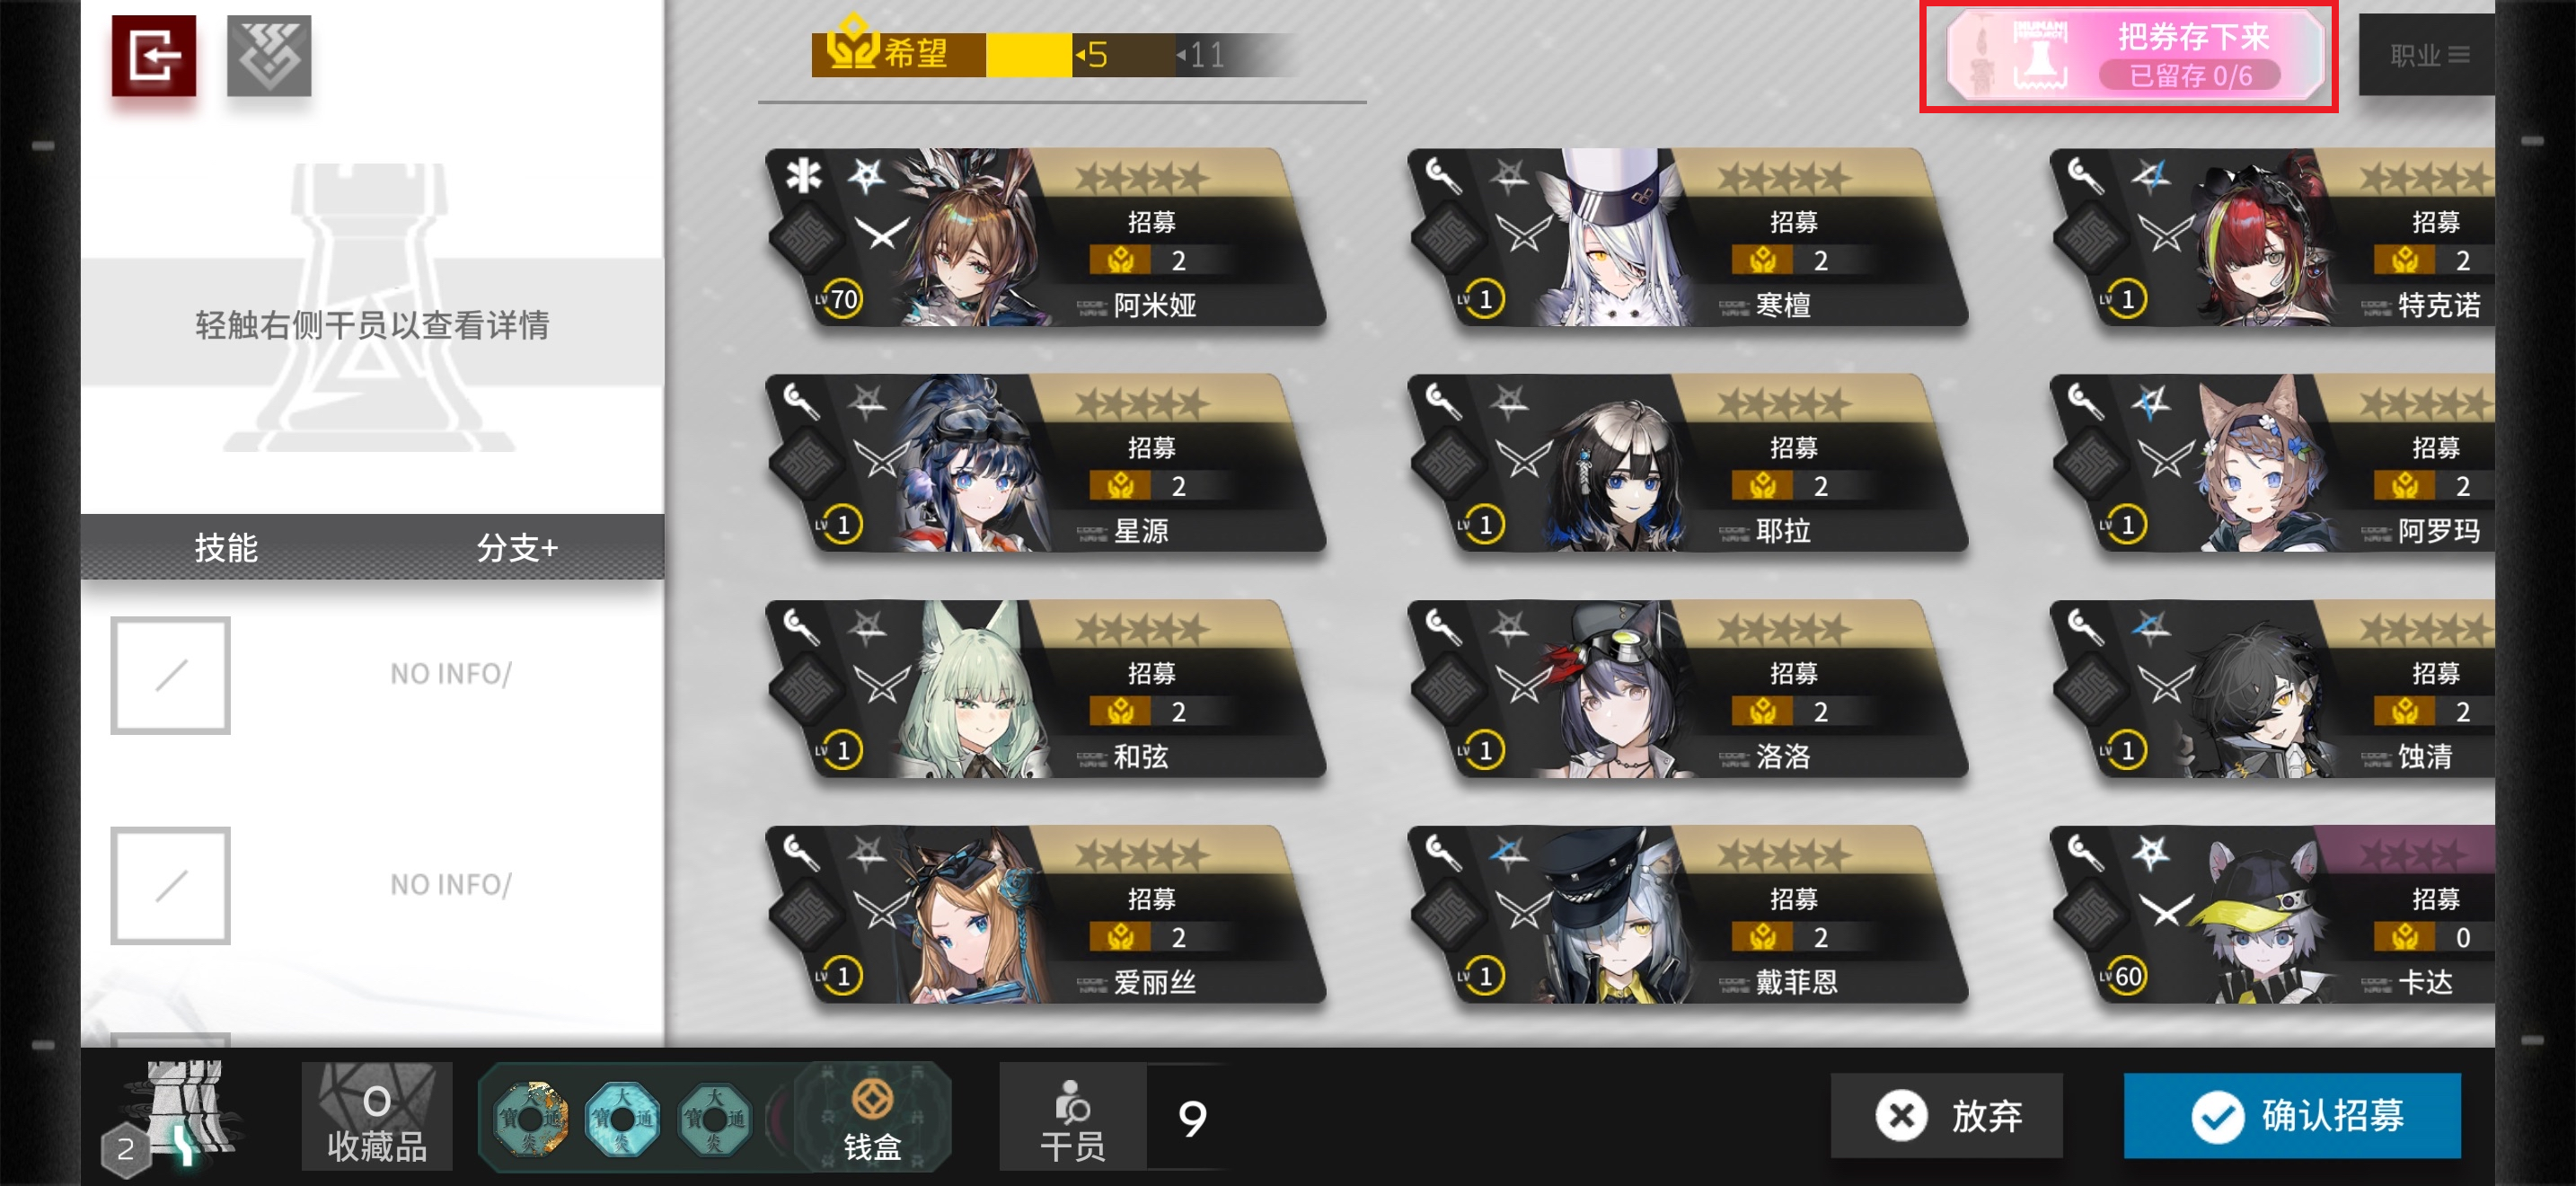
Conserving Vouchers
Section titled “Conserving Vouchers”IS6 introduces a new mechanic: Conserving Vouchers.
On every recruitment screen that isn’t your initial squad selection, you may conserve your recruitment vouchers until you reach a Pathfinder node. At these nodes, you can recruit or promote operators for -2 Hope and make these operators Candleguests. Note that only Candleguests may participate in combats inside Sui’s Remnant Consciousness, which is the IS6 equivalent of the “Bosky” hidden floor.
Sui’s Remnant Consciousness
Section titled “Sui’s Remnant Consciousness”Arguably the most important mechanic in IS6 is Sui’s Remnant Consciousness (often referred to as Bosky, a term carried over from the “Bosky Passage” in IS4).
Unlike previous iterations where you entered a temporary short map, IS6 features a web-like layout:

You can only use your Candleguests in here, you can convert or recruit candleguests from the “Pathfinder” node. Every time you enter a Bosky node on the main map, you pick up exactly where you left off on this web. To move between nodes, you spend Candle. You are granted a set amount of Candle upon entering the Bosky node:
| Floor | Candles |
|---|---|
| F1 | 3 |
| F2 | 5 |
| F3 | 3 |
| F4 | 5 |
| F5 | 5 |
You will have an option to spend 1 candle before entering the bosky to recruit 1 voucher you have conserved. Note: Bosky nodes are guaranteed at the end of F1 and F4. While there is a small chance they may not appear on F2, F3, or F5, you can safely assume they will appear on almost every floor in a standard run.
While most nodes are self-explanatory (combat, events, etc.), there are two specific types you must understand:
Doubts Nodes act as gates.
-
Entry Cost: 0 Candle.
-
Unlock Cost: 1 Candle (if you choose to proceed).
When you enter a Doubts, you are presented with randomized requirements to unlock the path behind it. You have three choices:
-
High Reward: Harder requirement. Grants 2 random relics upon unlocking.
-
Standard Reward: Easier requirement. Grants 1 random relic upon unlocking.
-
Leave: Costs nothing, but you cannot proceed past the Doubts this turn.
These nodes are the main reason Yan operators are highly favored in this theme. Requirements often involve having a specific number of Yan operators (e.g., “Own 2 Yan Operators” or “Own 4 Yan Operators”). But other requirements like maximum LP, current LP or hope are still worth noting and plan around.

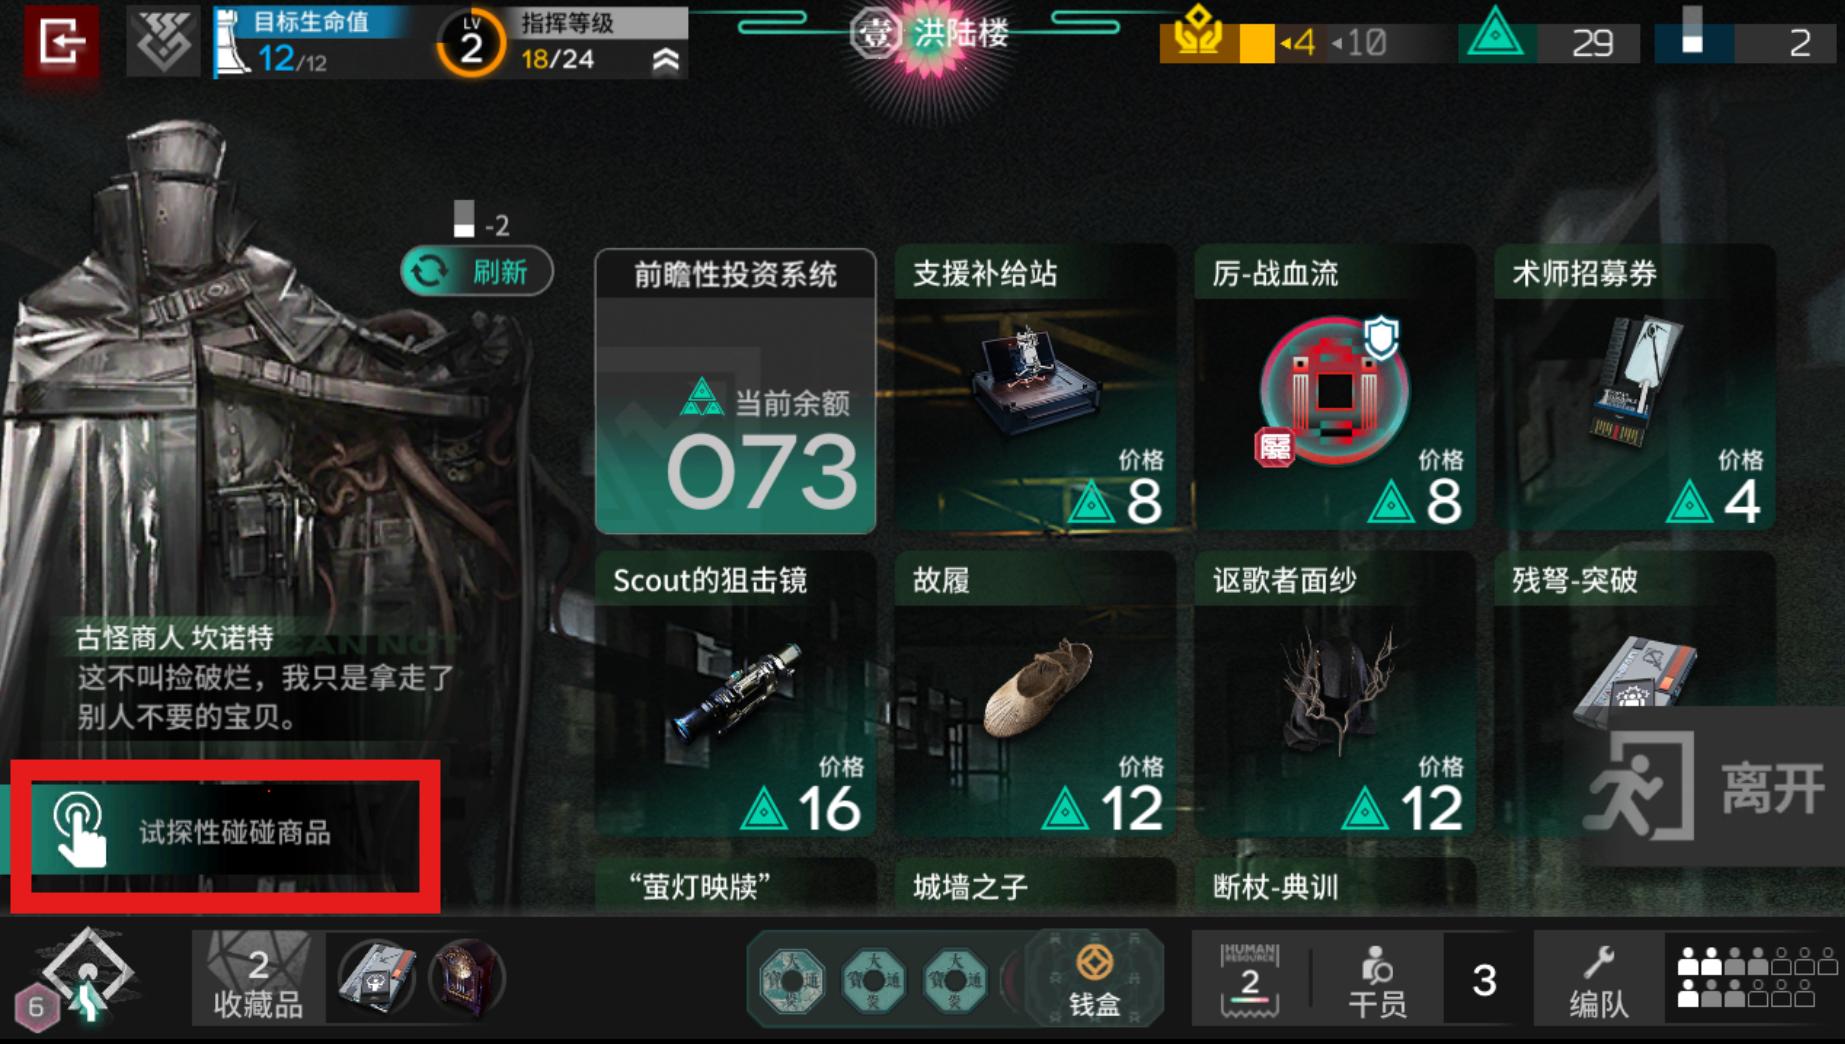
This is the shop you know and love… with a twist.
-
The Merchant: Ji (a “Suibling”) runs this shop instead of Cannot.
-
The Currency: You pay with Life Points (LP), not Ingots.
Because you are purchasing from Ji and not Cannot, Bosky shops remain functional even if you have robbed Cannot in the main run. Always remember that the Bosky shop is a powerful tool to convert your excess Life Points into tangible resources (relics, vouchers, coupons, coins, etc.) to help your run.
You can repeatedly enter the same shop node throughout your run, each shop node will retain their inventory until you manually refresh them with coupons.
Tongbao Management
Section titled “Tongbao Management”IS6 introduces an entirely new system: the Coin Coffer (coinbox). You start with a coinbox that can hold up to 7 Tongbao (coins). At the start of a floor, 3 random coins in your coinbox will be chosen to be “tossed,” triggering their effects for the current floor.
There are 3 types of coins, classified by their color:
-
Flower (Pink): The majority of these provide resources or utility. Some also provide minor combat buffs.
-
Balance (Blue): Combat buffs that primarily interact with “Transcendent Realm” (Temporary TL) tiles.
-
Risk (Red): These are also primarily combat buffs, but they tend to have a trade-off in exchange for a more potent upside (e.g., Enemy gains +25% ATK, but you gain +60% ATK). They offer very powerful combat bonuses if you can manage the downsides.
For a new player, a good rule of thumb is to always pick up Flower or Balance coins and replace tongbaos that are useless or less significant. As for Risk tongbaos, I advise against picking them up until you understand how they work. However, here are a few powerful Risk coins that generally offer a reward much greater than their risk:
| Image | Name | Effect | Explanation |
|---|---|---|---|
 | Risk-Getaway | When tossed, all allied units gain 55% Physical and Arts Dodge, and all enemies gain +25 Attack Speed. | While +25 ASPD to enemies sounds scary, the 55% Dodge you get in exchange mitigates the risk easily. |
 | Risk-They Who Endure | When tossed, Operators do not retreat upon being defeated for the first time; instead, they are redeployed on the same tile facing a random direction. | There is essentially no downside to tossing this coin. Redeployment means your agents might get to use their skills again. In the worst-case scenario, you can manually retreat the redeployed operators to generate DP. |
 | Risk-Dream of Curio | When tossed, all allied Operators’ SP costs are reduced by 40%, but their skills will activate automatically. | Although this disables skill timing management, -40% SP cost is simply too good to pass up. I would only avoid this if your team consists primarily of Phalanx Casters or Liberator Guards. |
 | Risk-Toll For Roads | While inside the coinbox, unlock a vertical path for the current node. When tossed, lose 5 Originium Ingots. | Easily the best coin you can get. Its effect activates by simply possessing it (no toss required). It allows unlimited vertical travel, meaning you can easily take Pathfinder and Bosky nodes on the same floor with a mere 3-6 coupon investment. Insanely broken. |
 | Risk-Bloodshed | When tossed, all enemy units’ Max HP is reduced by 45%, and all allied units’ Max HP is reduced by 25%. | 25% is steep pressure on your operators, but a 45% Enemy Max HP reduction is far better than any relic in the game. |
 | Risk-A Good Match | When tossed, all enemy units gain +25% ATK, and all allied units gain +60% ATK. | Similar to the previous coin, except the +60% ATK is a slightly worse reward for similar risk, but still worth considering. |
 | Risk-Falling Word | When tossed, initial deployment cost is increased by 99, but DP natural regeneration speed is reduced by 50%. | This coin is viable even if it were to removes all your natural DP regen. 99 starting DP is insane and solves all your opening needs. The downside is barely noticeable except in Endings, where you will likely have a Vanguard to solve it. |
F1 Pathing
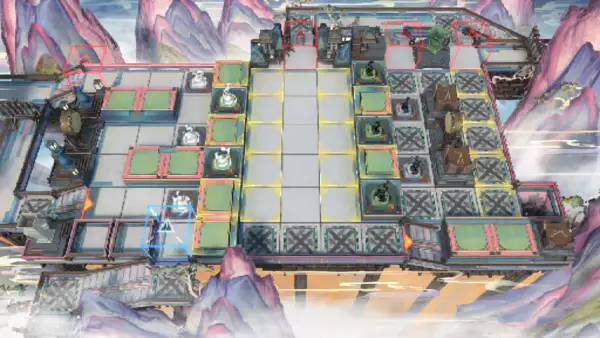
Section titled “F1 Pathing”Any viable starter can handle almost any Floor 1 combat with ease, so you should always aim to complete 2 combats and path towards the Emergency combat on Floor 1. Two standard combats take priority over the Emergency.

In this scenario, take the upper path because there is an Emergency combat stage on top of being a 2-combat route. If the first node had been an encounter, you would choose the bottom path to secure 2 combats.
Progression Milestone #1: Difficulty 2+
Section titled “Progression Milestone #1: Difficulty 2+”This is perhaps the most important milestone. The prerequisite to unlocking Raidian’s Elite 2 (E2) promotion is reaching and clearing Difficulty 2 (D2).
Reaching and clearing D2 is often the hardest hurdle. You start with no tree upgrades and limited knowledge of stage mechanics. Expect to fail a few times—this is normal.
At the beginning, you start with 4 available squads: Leader, Special, Support, and First Class. None are truly impressive at this point, but do not worry. Here is a solid strategy to help you get through the first 2 difficulties:
Shield Stacking Special Squad
Section titled “Shield Stacking Special Squad”Early in your progression, I recommend selecting the Special Squad. This squad provides excellent flexibility for the early game.
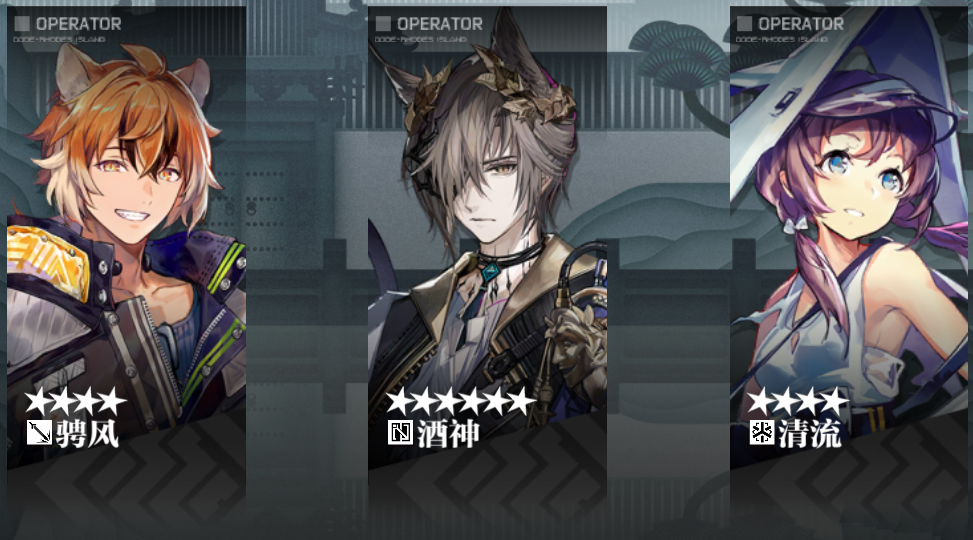
Recommended Starting Lineup:
-
Tragodia (6★)
-
Windscoot (4★)
-
Purestream (4★)

-
Tragodia: Your main carry. You will almost always use his Skill 2. Since the Special Squad provides reserved operators for blocking, Tragodia can focus purely on dealing damage with his cat rather than providing utility via Skill 3 or Skill 1. You do not need to own the operator; feel free to borrow a high-level Tragodia from a friend.
-
Windscoot: A solid 4-star Liberator. He provides decent burst damage for early stages. His primary downside (0 block while off-skill) is mitigated by the reserved operators from the Special Squad. Additionally, he is a Yan operator, which triggers specific event mechanics.
-
Purestream: A reliable healer with incredible range. Her Skill 2 can keep the team alive under high pressure. Like Windscoot, her status as a Yan operator provides mechanical benefits.
If you don’t have the 4★ operators raised, feel free to borrow them or start with Reserve Operators. They are good to have but not essential for our strategy.
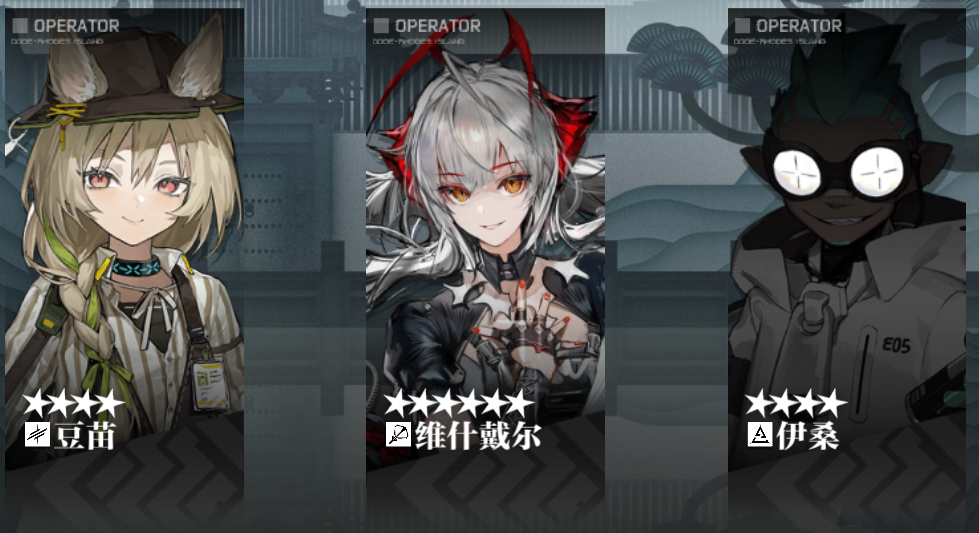
Throughout your run, here are some good 6★ operators to look for in early difficulties:

As for the 4★s, try to have Ethan and Gravel raised, Myrtle, Windscoot, Jaye and Purestream are also great but not crucial to our strategy. Of course, there are many viable 4★ in different strategies, but for the purpose of this guide you will only be using the above operators, and they can be used at E1.
Do not worry if you don’t have any of them! This portion of the guide is designed for people with Tragodia as their only available 6★, and you can even win a run with only Tragodia and Reserve Operators.
Note that during your run, you can look to pick up this specific tongbao:
 | Risk-Law and Ritual | On toss, all allies -65% Deployment Time, but -2 Deployment Limit |
|---|
Since Special Squad starts with +2 Deployment Limit, Law and Order’s side effect is well mitigated. Tragodia’s S2 will benefit greatly from tossing Law and Order.
The Bosky Shield Farm
Section titled “The Bosky Shield Farm”Throughout your run, look to enter Bosky (Sui’s Remnant Consciousness) at least 3 times: on F2, F4, and F5. Prioritize your pathing to avoid entering one node repeatedly. Reveal the entire map to eventually find this specific node called “Tavern” (it’s guaranteed to be within the 5x5 area from the center):
The Tavern node can be entered repeatedly, and some of its options allow you to exchange Ingots for Shields/Life Points (LP). The goal is to spend all your accumulated Ingots here for more shields—ideally 15-20 effective LP by the end of F5 if Tragodia is your only 6★. You need less if you acquired a carry that can lane-hold before the end of F5.
Ending 1 Strategy
Section titled “Ending 1 Strategy”The boss might be a little difficult at first, but reference this video here. It demonstrates a Tragodia single 6★ solution to the fight, assuming that you will leak every enemy from the right side. This strategy works well if you have the LP to spare. Overall, Ending 1 should be a breeze with Tragodia.
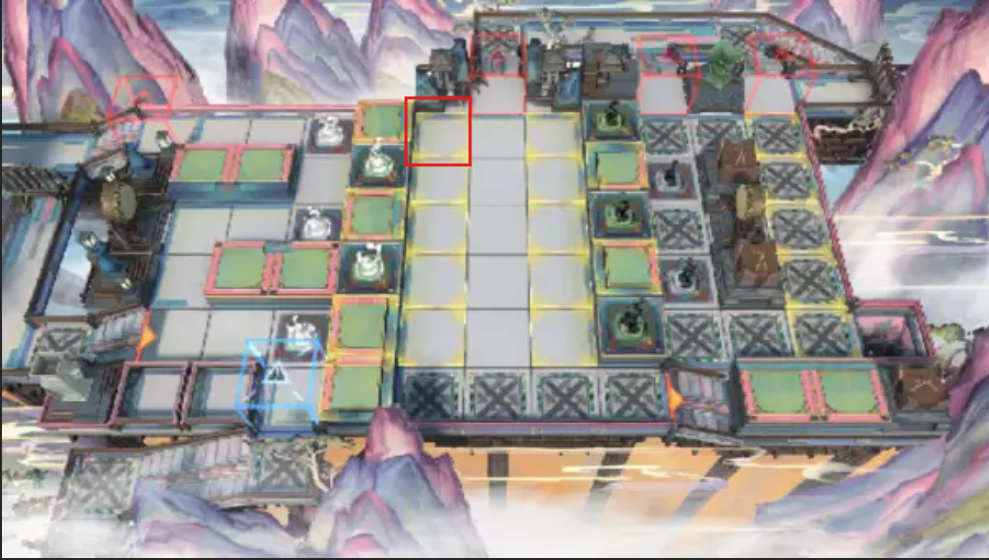
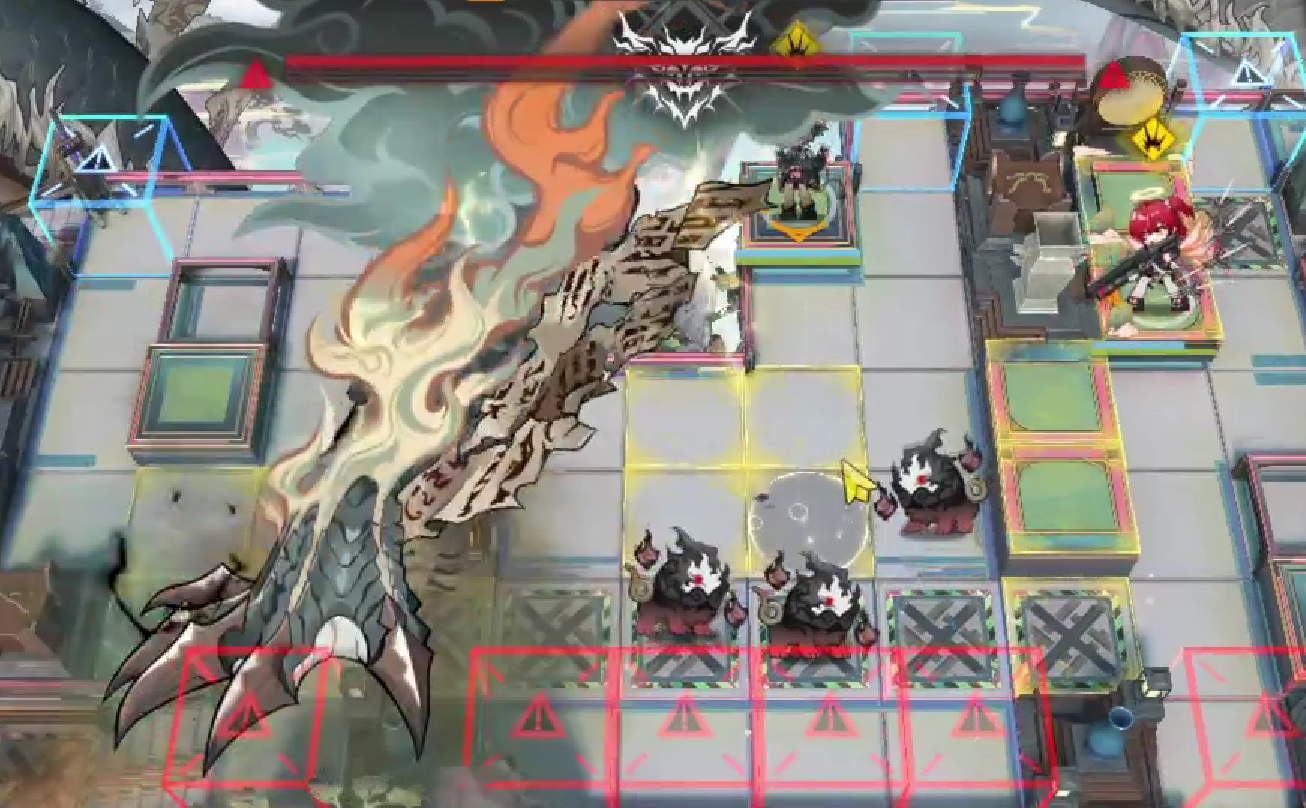
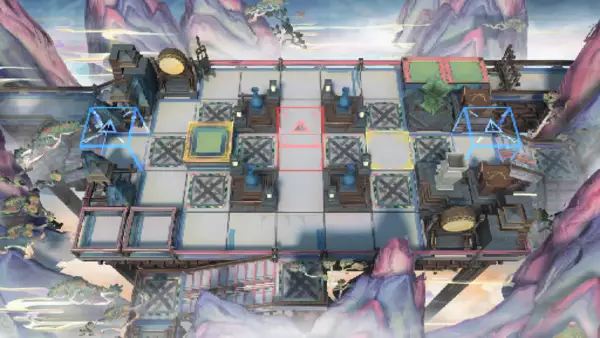
Let’s take a look at the layout:
Despite its appearance, this is effectively a 1.5-lane stage. The boss, Yi, will come down the middle and loop for a while before entering the orange portal and heading directly to your blue box. Meanwhile, enemies on the right will eventually path to the same portal. With a powerful squad, it is possible to clear everything on the left and effectively turn this into a single-lane map.
However, defending the left is not without obstacles. If you let Yi walk freely, his skill summons explosives that deal massive damage upon contact with an operator or another explosive. These summons spawn relative to his current row; the further down the map he is, the more likely the explosives will interfere with your lane holders. Therefore, you must attempt to stall him on a higher tile.
Usually, you do this by blocking, but with Tragodia, you can permanently stall him using a fast-redeploy operator (such as Gravel) by placing the cat at this position:
and then block him whenever he has paralyze stacks up.
You can reference the video for exact timing, but there are two key moments you should know:
- When he is walking
- When the second wave of explosives collides. Deploy the cat at these moments and place a ground operator to block him. This allows you to stall him infinitely. You should retreat the operator as soon as he enters the animation to summon his explosives, but the timing is very forgiving and offers a lot of room for error.
Recovery: In case of a mistake, do not panic. Let Yi walk a full circle and hold the lane with your tankier ground operators. A “checkpoint” exists during Yi’s first phase: as long as you do not push him into Phase 2, no new enemies will spawn. This means there is a finite number of enemies to deal with before the checkpoint is reached. Stay calm and pull yourself back on track.
The Right Side: The next threat comes from the right side. There are a few enemy variations, but the safest strategy is often to leak them all, especially if Sharpedges are present. If you are not careful, fighting them poorly can result in losing significantly more Life Points than if you had simply chosen to leak them from the start.
Alternative Strategies: If you are attempting this stage without Tragodia, you can stall Yi using multiple tanky units. Raidian S1 is excellent for this job, and Kal’tsit’s Mon3tr works similarly. This method is less consistent than Tragodia because Yi’s damage scales quickly with higher difficulties, but if you know what you are doing, it is still very achievable.
After completing Difficulty 2, you can now upgrade Raidian to Elite 2.
Progression Milestone #2: Difficulty 6+
Section titled “Progression Milestone #2: Difficulty 6+”Difficulty 6 (D6) is the next major checkpoint. Reaching this difficulty allows you to unlock all of Raidian’s Proficiencies.
Proficiencies are game-changers: they provide extra resources, reduce Hope costs, and fundamentally alter how Raidian functions.
Unlock Requirements for Proficiencies:
To max out Raidian, you must complete specific challenges at Difficulty 6 or higher:
-
Clear an Emergency Battle with Raidian recruited.
-
Clear a run using Raidian’s Summons to defeat the Ending 1 Boss.
-
Clear at least 2 Turmoils (Combat node inside of Sui’s Remnant Consciousness) and achieve Ending 1 (with Raidian).
-
Turn 6 operators into Candleguests and achieve Ending 2.
Completing these proficiencies validates Raidian’s reputation as the strongest operator in IS6. Most notably, Combat Mastery I (unlocked by defeating the Ending 1 Boss with summons) allows Raidian’s summons to not consume deployment slots starting from Floor 4. This transforms her from an early-game helper into a late-game monster.
To help you reach D6, here are some new strategies to consider involving the Special Squad and Leader Squad.
Special Squad
Section titled “Special Squad”After E2ing your Raidian, the Special Squad upgrade effect grants you a Free, Max Potential, M9, Module Level 3 Temp-Recruit Raidian in addition to your reserved operators. With that, you’re ready for our next milestone.
Even though this Temp-Raidian shares your current Proficiency level, her raw stats alone will carry you through the early floors effortlessly.
This also means that you get to start with another 6★ together with Raidian. Exusiai the New Covenant, Tragodia, and Wiš’adel are my recommended options because they cover the most scenarios.

I recommend Tragodia for Ending 1. As soon as you’re ready for the Ending 2 mission, swap over to Exusiai the New Covenant (or a Sniper/Medic squad with Wiš’adel).
Note: It is better to E2 your Raidian first if you started with Tragodia and picked up a Supporter voucher.
Leader Squad: F1 Shop Rob
Section titled “Leader Squad: F1 Shop Rob”On Difficulty 3 and beyond, the Leader Squad starts with the “End of Times” relic. This allows us to exploit the F1 shop.

You must have this tree node unlocked.
Why does this work?
IS6 has no guaranteed shop after F1, so you are essentially trading away an uncertain future shop for extreme early power. This helps you clear early Bosky fights, pass the F3 boss stat check, and play the game more freely. Note that You need to invest 50 ingots to unlock the “rob” feature first.
Since we are no longer starting with Reserved Operators, select Humus as our initial guard:

The Process:
-
Enter the F1 Shop.
-
Buy out the entire first page.
-
Use coupon to refresh the page.
-
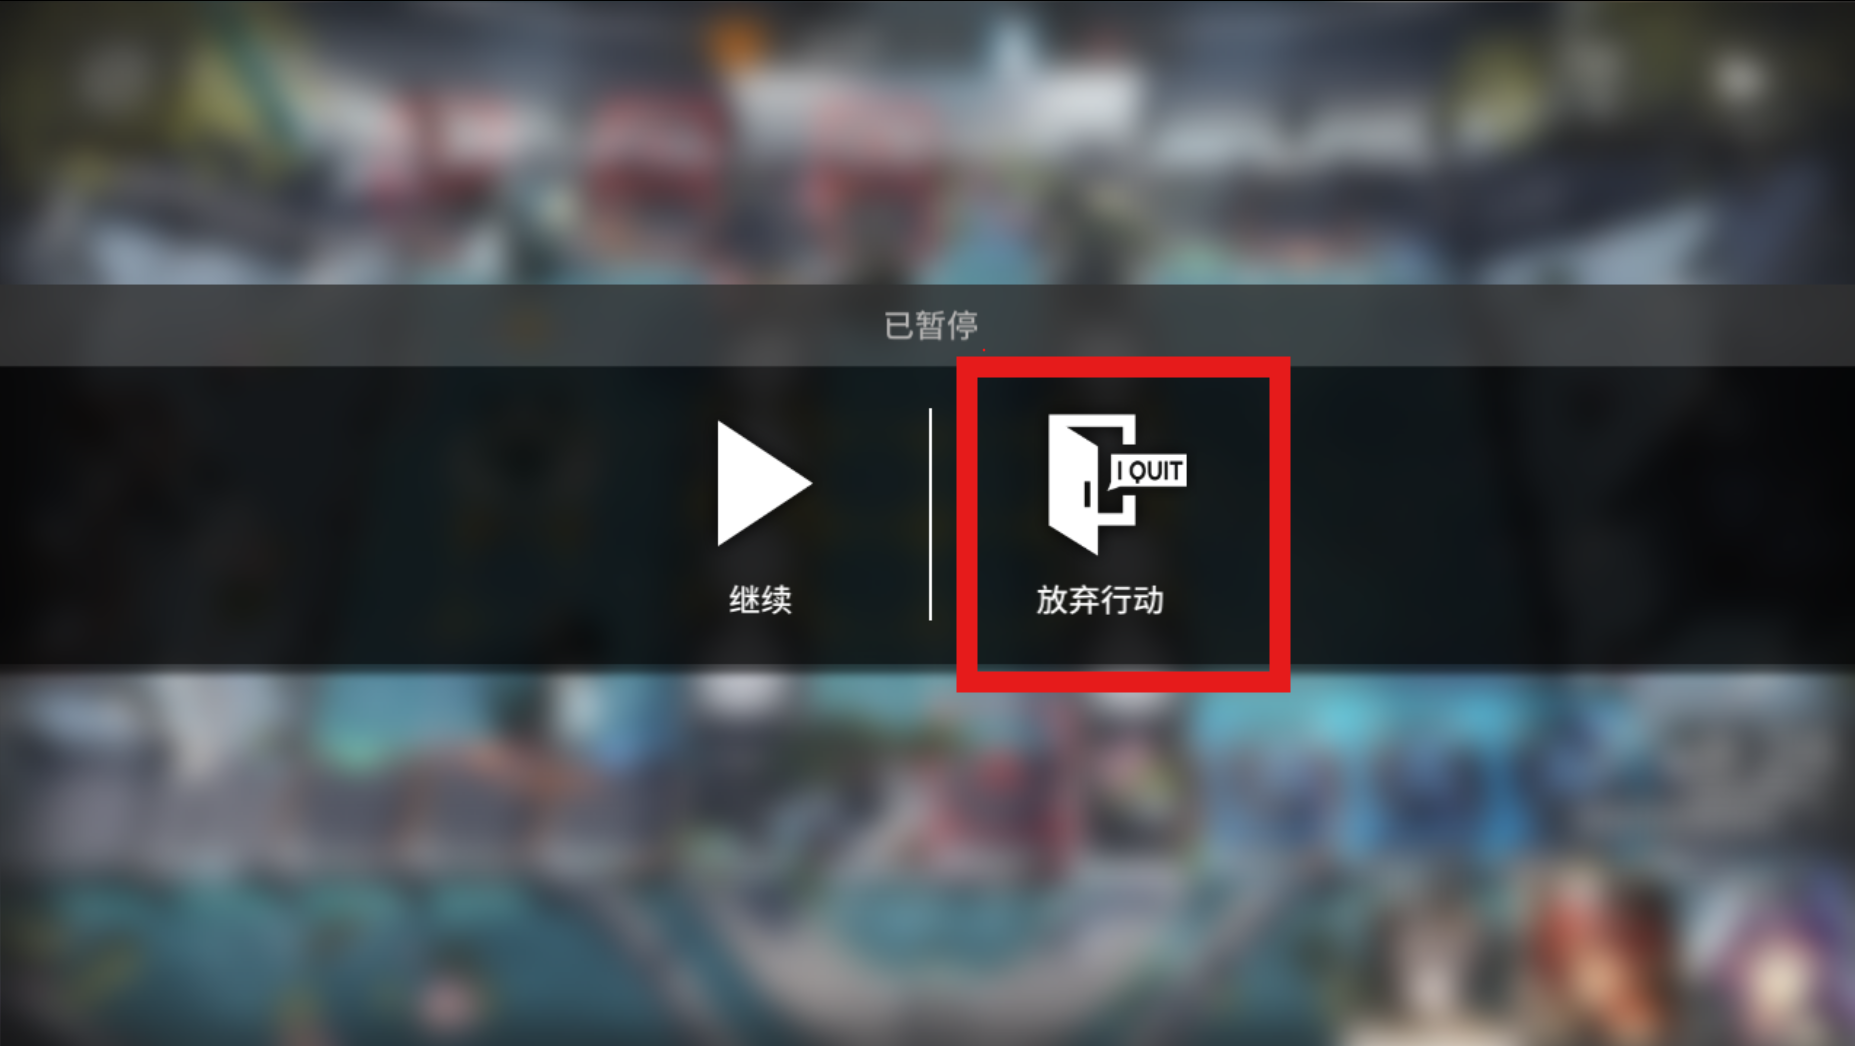
Press the bottom left button multiple times to trigger the “Rob” fight.
-
After entering the stage, immediately exit the stage.

-
“End of Times” will trigger, bringing you back to a blank result screen. You may then proceed to take every relic in the shop for free.

This will not invalidate your ingots; there are plenty of other ways to spend them, such as shield stacking or downtime recreation inside Bosky. With these relics, you should dominate the first few floors, and you can restart/repeat this process until you get high-tier relics.
Ending 2 Explained
Section titled “Ending 2 Explained”Here comes the most difficult part: Turn 6 operators into Candleguests and achieve Ending 2.
To do this, especially as a new player, ensure you have upgraded Raidian’s Combat Mastery. This is done by beating Ending 1 with Raidian on D6+, which allows you to place down 5 Raidian “fishes” (summons) in the ending without taking up deployment slots.
Squad Requirements:
-
E2 Raidian and E2 Exusiai the New Covenant are essential.
-
18+ Life Points (LP) are highly recommended. Use the shield-stacking method mentioned earlier to achieve this buffer.
How to Unlock Ending 2: To trigger Ending 2, you must explore Bosky nodes until you find this specific encounter:
You are presented with 3 options:
-
Pay 30 Ingots to guarantee the ending item.
-
Toss Coins: If you are lucky, you can pay all your current Ingots for the ending item.
-
Leave: If you aren’t going for Ending 2, select this to obtain a random relic instead.
Recommendation: Always save 30 Ingots to guarantee the item if you are actively pursuing Ending 2.
Mechanic: Sui’s Remnant Body
Section titled “Mechanic: Sui’s Remnant Body”Once you obtain the ending item, Sui’s Remnant Body will intrude upon every subsequent battle.
Its behavior is similar to Finale Cadence from IS5. The Remnant Body carries over its HP from the previous stage and continues to harass you until defeated.
Combat Behavior:
-
The Meter: It uses a progress bar similar to the Londinium Secondary Defense Artillery. When the bar fills, it slams the ground.
-
Targeting Logic: It prioritizes the 3x3 area with the highest density of operators.
- Tie-Breaker: If multiple areas have the same density, it prioritizes the area closest to the Bottom, then the Left.
-
Duration: After the slam, it remains on the field for 20 seconds before temporarily leaving.
Defeating It: You must lower its HP below 50%. Once achieved, it will retreat permanently and grant you a relic:
 | Every battle, a random Operator will have their DP Cost reduced to 0. When carrying this Collectible, can choose to lead expedition in a different direction in Prophecy |
|---|
Afterward, you’re set for Ending 2:
Execution:
-
The Opening: Begin by dropping your agent (Surfer or Cantabille work well) to clear the Statuegeist. The Statuegeist may spawn on the left or right, but it does not matter.
-
Positioning: Place Exusiai and Raidian in the following positions:

Surfer will stay exactly where she is; do not retreat her. When the white bar is full, the boss will slam on top of Surfer, retreating her and putting her on a 30-second redeployment cooldown.
-
Surviving the Stomp: Right after the stomp, activate Exusiai’s S2 to grant Raidian and herself a shield, allowing them to survive the stomp damage. You can activate her skill slightly before the stomp to be safe.
-
The Left Lane Strategy: After the stomp finishes, a Sharpedge will spawn on the left side. Here is the trick:
Unless you are extremely confident, leave the left lane alone for the entire stage.
This will cost you 17 LP total, but it is worth it. Prematurely killing Sharpedges often leads to worse outcomes. For a beginner, the safest solution is to stack 17+ LP and leak everything on the left.
-
Baiting Stomps: For the following stomps, try to bait the boss at this position:

The foot’s targeting algorithm is simple: it prioritizes the area with the most grouped operators. Therefore, keep your operators separated. In case of same density of allied units, it will prioritize nearest to the bottom -> nearest to the left, please keep that in mind.
-
Right Lane Defense: For enemies on the right side, push them into Exu’s range by placing down Raidian summons as they reach the upper half of the block:

If you have strong relics, you can point the summon downward and use Raidian’s skill to deal with enemies on the right.
-
The Cycle: Rinse and repeat. Important: Avoid hitting the boss below 50% HP until you are ready, as he will retreat every unit on the field and put them on a 40-second redeployment. If you have another set of carries, you can bait the boss on the left to avoid damaging him too early.
-
The Finish: After getting the enemy count to 54/55, you can safely DPS the boss. Wait out the redeployment and finish him off.
Progression Milestone #3: Clearing Difficulty 10
Section titled “Progression Milestone #3: Clearing Difficulty 10”Congratulations! You’ve completed the majority of the progression. Now, all that remains is to:
-
Use Raidian to clear Ending 3 on Difficulty 9 and 10 (to reach Module Level 3).
-
Use the 3 Theme Squads to clear any ending on Difficulty 7 or above to unlock her Mastery 3 skills.
Note: Ensure you have unlocked each theme squad’s upgrade node first.
S1M3: Tourist Squad
Section titled “S1M3: Tourist Squad”
Objective: Complete a run with Raidian recruited and achieve any ending with Tourist Squad in Difficulty 7 or above.
The Tourist Squad playstyle is unique. You start with 3 extra coupons (allowing for triple combat on F1 without robbing the shop), an increased Coinbox limit, and higher toss counts. You benefit significantly from playing around coins.
Since any ending works, I advise going for Ending 1 using the Tragodia carry.
Starters: Exusiai the New Covenant, Tragodia, Raidian, or Wiš’adel are the easiest E1 starters.
During your run, pay close attention to Emergency, Pathfinder, and Faceoff nodes. The combat options in Pathfinder, the first option of Faceoff, and Emergency battles all give a juicy amount of coins to fill your box. Tourist Squad scales incredibly well into the late game due to the power ceiling of a well-built Coinbox.
Tip: Find the “Plan” node in Bosky if you have high-value coins you can’t utilize:

You will have a rougher start due to lower early power and the risk of rolling debuff coins, but Tragodia should handle early maps until your Coinbox is built.
S2M3: Regulator Squad
Section titled “S2M3: Regulator Squad”
Objective: Complete a run with Raidian recruited and achieve any ending with Regulator Squad in Difficulty 7 or above.
The Regulator Squad offers the highest consistency. Its effect allows you to conserve 2 more vouchers and automatically conserves a random voucher upon reaching a new floor. Because you get so many vouchers, it is easy to snowball, especially on lower difficulties.
Starters: You can choose freely. Since 2 combats + 1 shop refresh + squad effect gives you 6 vouchers by F2, feel free to borrow a powerful carry and recruit your own on F2. Alternatively, start with May, Gummy, and Click to save hope for recruiting 6-stars on F2.
Pathing: Focus on Pathfinder nodes to get inherent value. Make sure you have Tragodia recruited before Ending 1 to repeat the permastall strategy.
S3M3: Tianshi Bureau Squad
Section titled “S3M3: Tianshi Bureau Squad”
Objective: Complete a run with Raidian recruited and achieve any ending with Tianshi Bureau Squad in Difficulty 7 or above.
Tianshi Bureau Squad focuses on pathing and Bosky optimization. Its effect adds a guaranteed option in Safehouses to recruit an operator from a conserved voucher, then enter Bosky with 2 Candles (steps). Essentially, every Safehouse becomes a “Recruit 1 + 3 Steps Bosky,” which optimizes pathing significantly.
Starters: Exusiai the New Covenant, Raidian, or Wiš’adel. Tragodia is not optimal here due to limited Bosky power, but use him if he’s your only option.
Strategy: Enter Bosky at the end of F1 to utilize the +1 Candle effect. Accumulate vouchers and try to have your starter carry at E2 by the start of F2. Afterward, prioritize Safehouse/Bosky on every floor to juice all resources. This squad is less reliant on Pathfinder since you can recruit via Safehouse.
Ending: Use Tragodia permastall for Ending 1.
Module Level 3: D10 Ending 3
Section titled “Module Level 3: D10 Ending 3”Here comes the final challenge: Ending 3. You can freestyle with your preferred squad, but here are my recommendations:
-
Special Squad (Tragodia/Exu/Wiš’adel start)
-
Leader Squad (F1 Shop Rob, Tragodia/Exu/Wiš’adel/Raidian start)
-
Regulator Squad (Raidian/Tragodia or 4-star only start)
Ending 1 makes sense here because Ending 1 is easily solved by Tragodia, and Ending 2 requires leaking (risky on high difficulty).
In order to access ending 3, you must have beaten ending 2 before. Afterward, the first doubts you revealed inside Sui’s Remnant Consciousness is guaranteed to be a special doubts, note that you must take Option 1’s Unflinching Masterplan in order to enter Ending 3’s prerequisite stage.
 | Operators lose 50% SP on deployment; When carrying this Collectible, a special Operation option will appear in Pathfinder |
|---|
Ending 3 Checklist:
-
A healer with good range (e.g., Purestream, Quercus or Haruka).
-
2 Carries that can lane-hold under pressure and hit aerial enemies.
-
Anti-invisible utility, or enough “meat shields” to block stealth enemies.
-
A tanky ground unit (e.g., E2 Gummy or Guard Amiya).
Clarity: Ending 3 Prerequisite Stage
Section titled “Clarity: Ending 3 Prerequisite Stage”Look to recruit good ground presence to complete the prerequisite stage:
This stage is annoying due to limitations against high-ground units (except Wiš’adel).
The Mechanics:
-
Swordsmen: Hold 3 charges of Talisman and attach them to operators directly next to them.
-
Pieces (Circular Devices): Burn operators next to them and permanently stun operators surrounded only by other Pieces or map edges.
The Strategy:
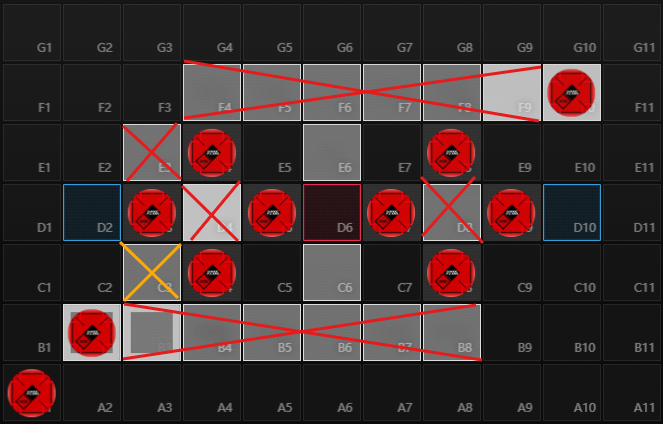
Red crosses represent unsafe tiles (Talisman danger or Permastun danger). C3 suffers burn from 2 Pieces.
Opening: Deploy ground operators on E6 or C6. Attempt to kill the Swordsman or Pieces with them to free up high-ground tiles, as there are zero safe high-ground tiles at the start.
Recommended Openers:

-
E2 Wiš’adel: Can deploy on F9 due to Camouflage.
-
Leizi the Thunderbringer: Can also deploy on F6 or B6 (immune to Talisman during takeoff).
-
Ground Healers (e.g., Gummy): Can help high-ground operators on D4 survive burn damage.
Once high ground is free and carries are down, the stage becomes trivial. After the stage is completed, you will be given a debuff relic that states:
 | Operators lose 2% of Max HP for 60 seconds on deployment; Leads expedition in a different direction |
|---|
You must be extremely careful while holding this relic.
-
No Exchange: It cannot be exchanged or tossed at the Lost and Found. Once you pick it up, you are stuck with it.
-
The Downside: It will kill your operators if they have no means to heal themselves.
This effect, combined with Ending 2’s limited deployment tiles, makes attempting Ending 2 while holding this relic (often referred to as the “2+3 combination”) extremely dangerous. This specific combination should be avoided until you have a deeper understanding of the theme.
For now, the golden rule is: Always ensure you have healers in your squad, both inside and outside of Bosky.
The Sui Strategist: The Boss Stage
Section titled “The Sui Strategist: The Boss Stage”YOU CAN ONLY ENTER THIS STAGE WITH CANDLEGUEST OPEARTORS!!!
Plan around accordingly, figure out who is needed here so you can be prepared.

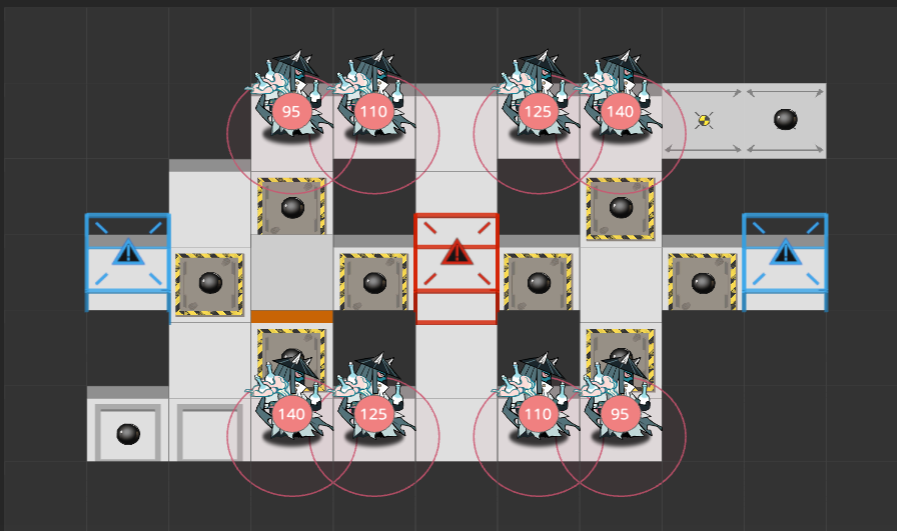
The Opening (Most Dangerous Variation):

The boss actively summons Pieces after you place an ally unit. If an operator is permastunned, the boss enters a rampage. However, the boss himself is weak if you obey the rules.
The Wallbreakers:
Two Wallbreakers on the right threaten high ground immediately. They loop around G9/C9 until 3:15 has passed, then enter the blue boxes. You cannot wait them out (24 lives lost).
Solution: Use ground operators to kill them before dropping high grounds. Liberator Guards on E10 work well as the Wallbreakers stop at checkpoints within range.
Positioning:

-
Each carry holds one lane.
-
Healer in the middle covers both.
-
Tanky ground unit (Gummy spot) blocks the boss.
The Pseudomuts:

13 Pseudomuts total. The first 4 loop, but the rest head for blue boxes. They consume the first ally they touch, takeoff, and reduce their DEF to 0.
Solution: They have 110k HP / 1800 DEF on D10. Use Arts damage (Logos) or burst (Wiš’adel/Exusiai). If a Pseudomut gets too close to your boss-blocker, feed it a generic operator to save your blocker.
The Stealth Talisman Shooters:

Around the 5-minute mark, 3 Talisman shooters spawn from the top red box—with Stealth.
Solution: Use Ines for reveal, or deploy extra carries/ground units to block and kill them immediately. If they live for an extended period of time, the run is likely over.
If you solve these challenges, the boss is practically non-existent. He will be forever blocked by your central tank, unable to kill them due to low damage.
Conclusion
Section titled “Conclusion”Congratulations! You should now have your Raidian maxed and understand the basics of IS6. Note that some strategies here (like the specific tanking methods) may become less optimal at super-high difficulties, but do not be discouraged. Discovering your own strategy is the essence of Integrated Strategies.
If you haven’t already, join the IS Central Discord for more info and to chat with passionate individuals about your favorite IS theme!