Contribute
The IS Central website is a community-driven project. We welcome contributions from the community to help us improve the website.
How to Contribute
Section titled “How to Contribute”We currently have two main ways of contributing, via Netlify CMS (an online editor) or via Github.
Check the templates page for templates to use when writing guides.
Adding a new stage guide with Netlify CMS
Section titled “Adding a new stage guide with Netlify CMS”Register a Github account if you don’t have one.
Visit the IS Central Netlify Admin page and login with Github.
Make sure to make a fork. Netlify work on your account on behalf of you, so if you want to use this fork for the method below you can switch anytime.
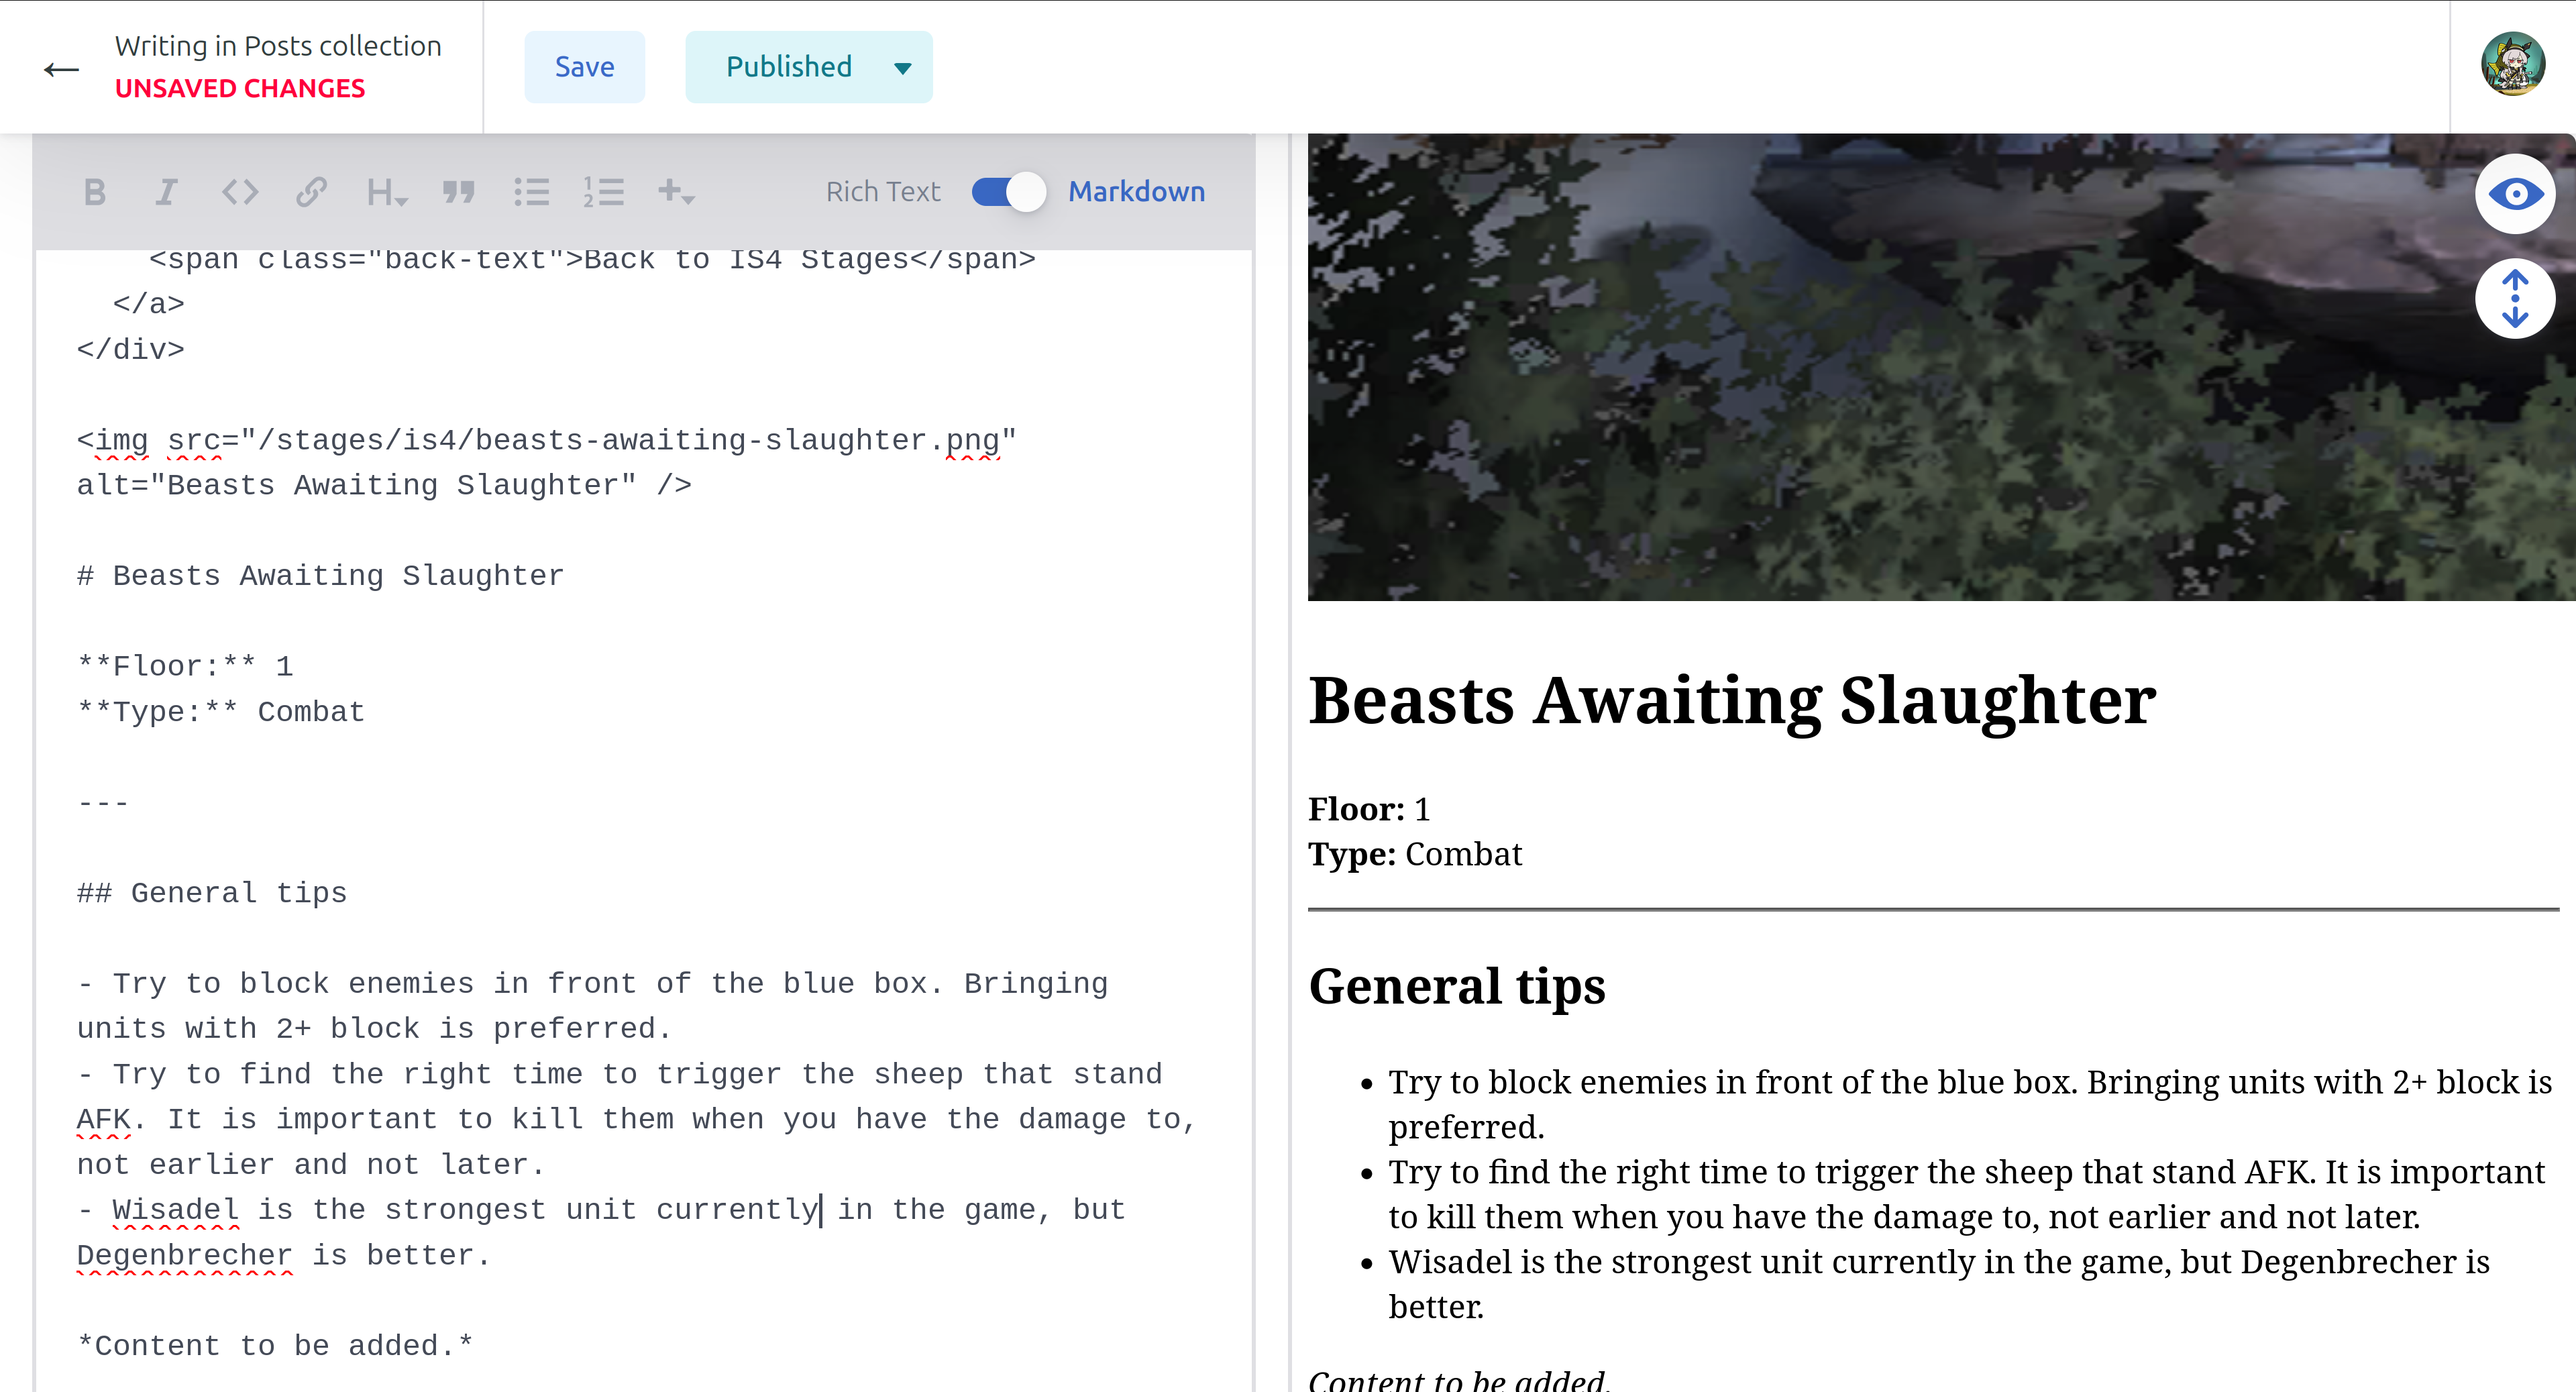
Now let’s pick a stage to update. Using the dropdown menus or the search bar, we can navigate to a stage guide of our choice.
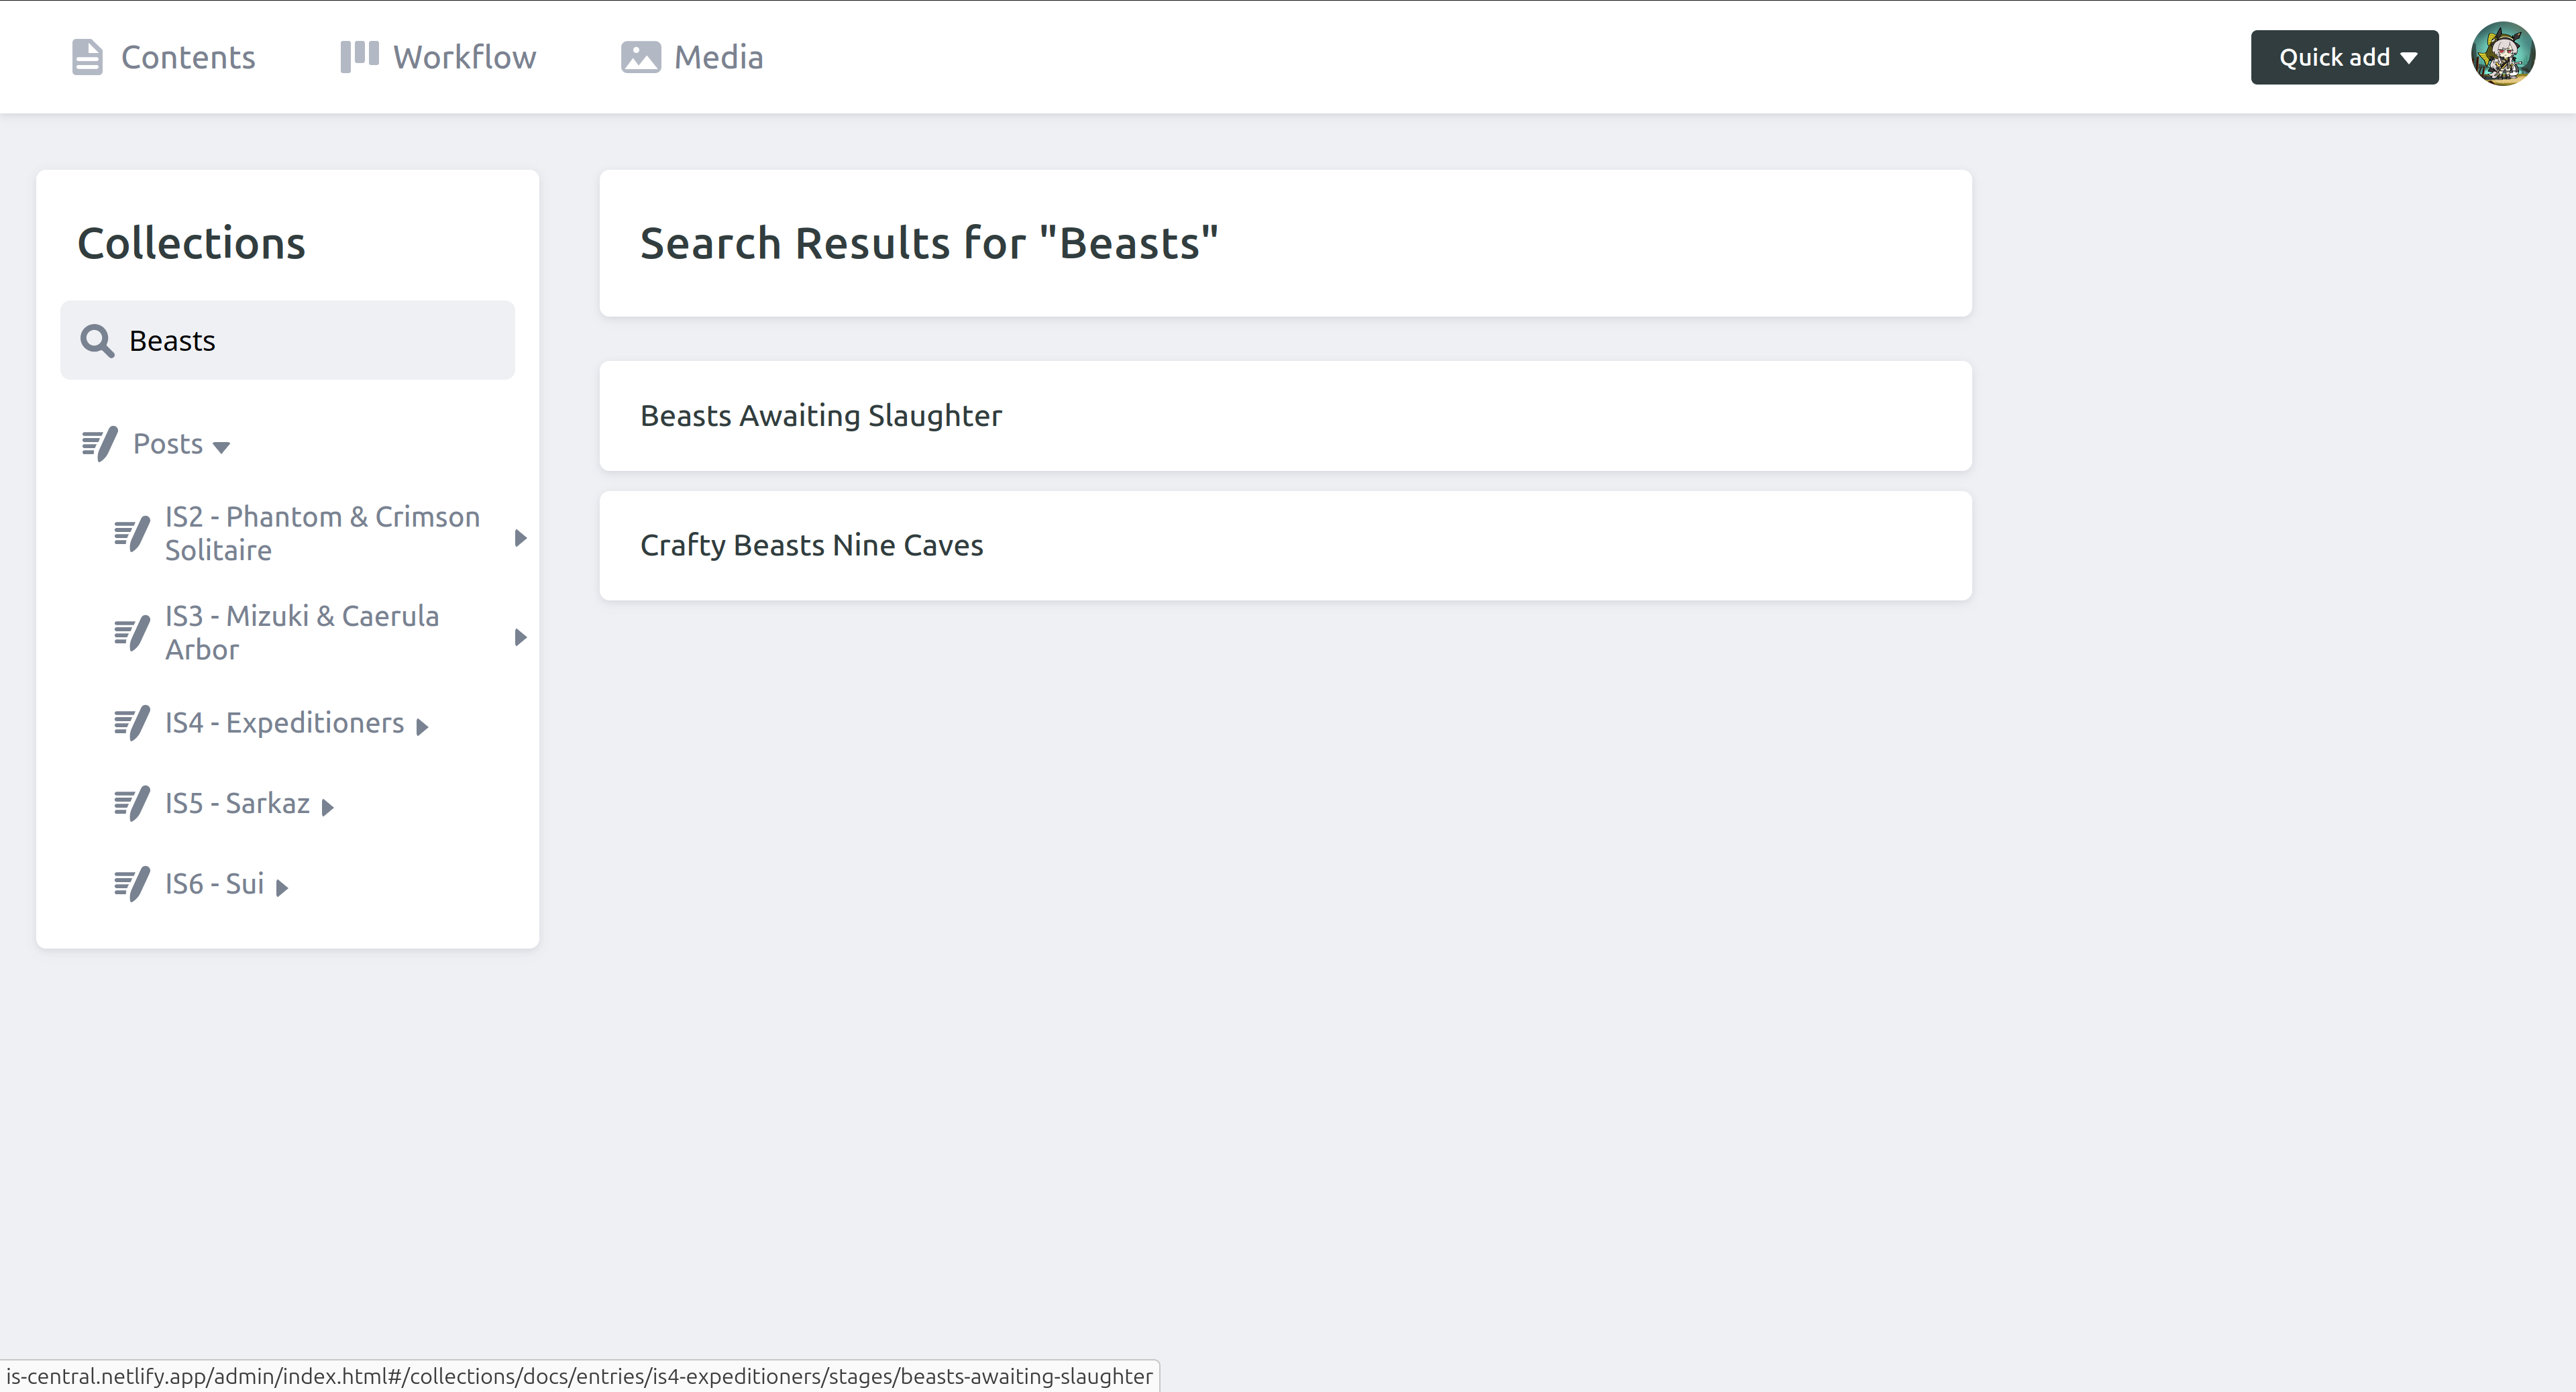
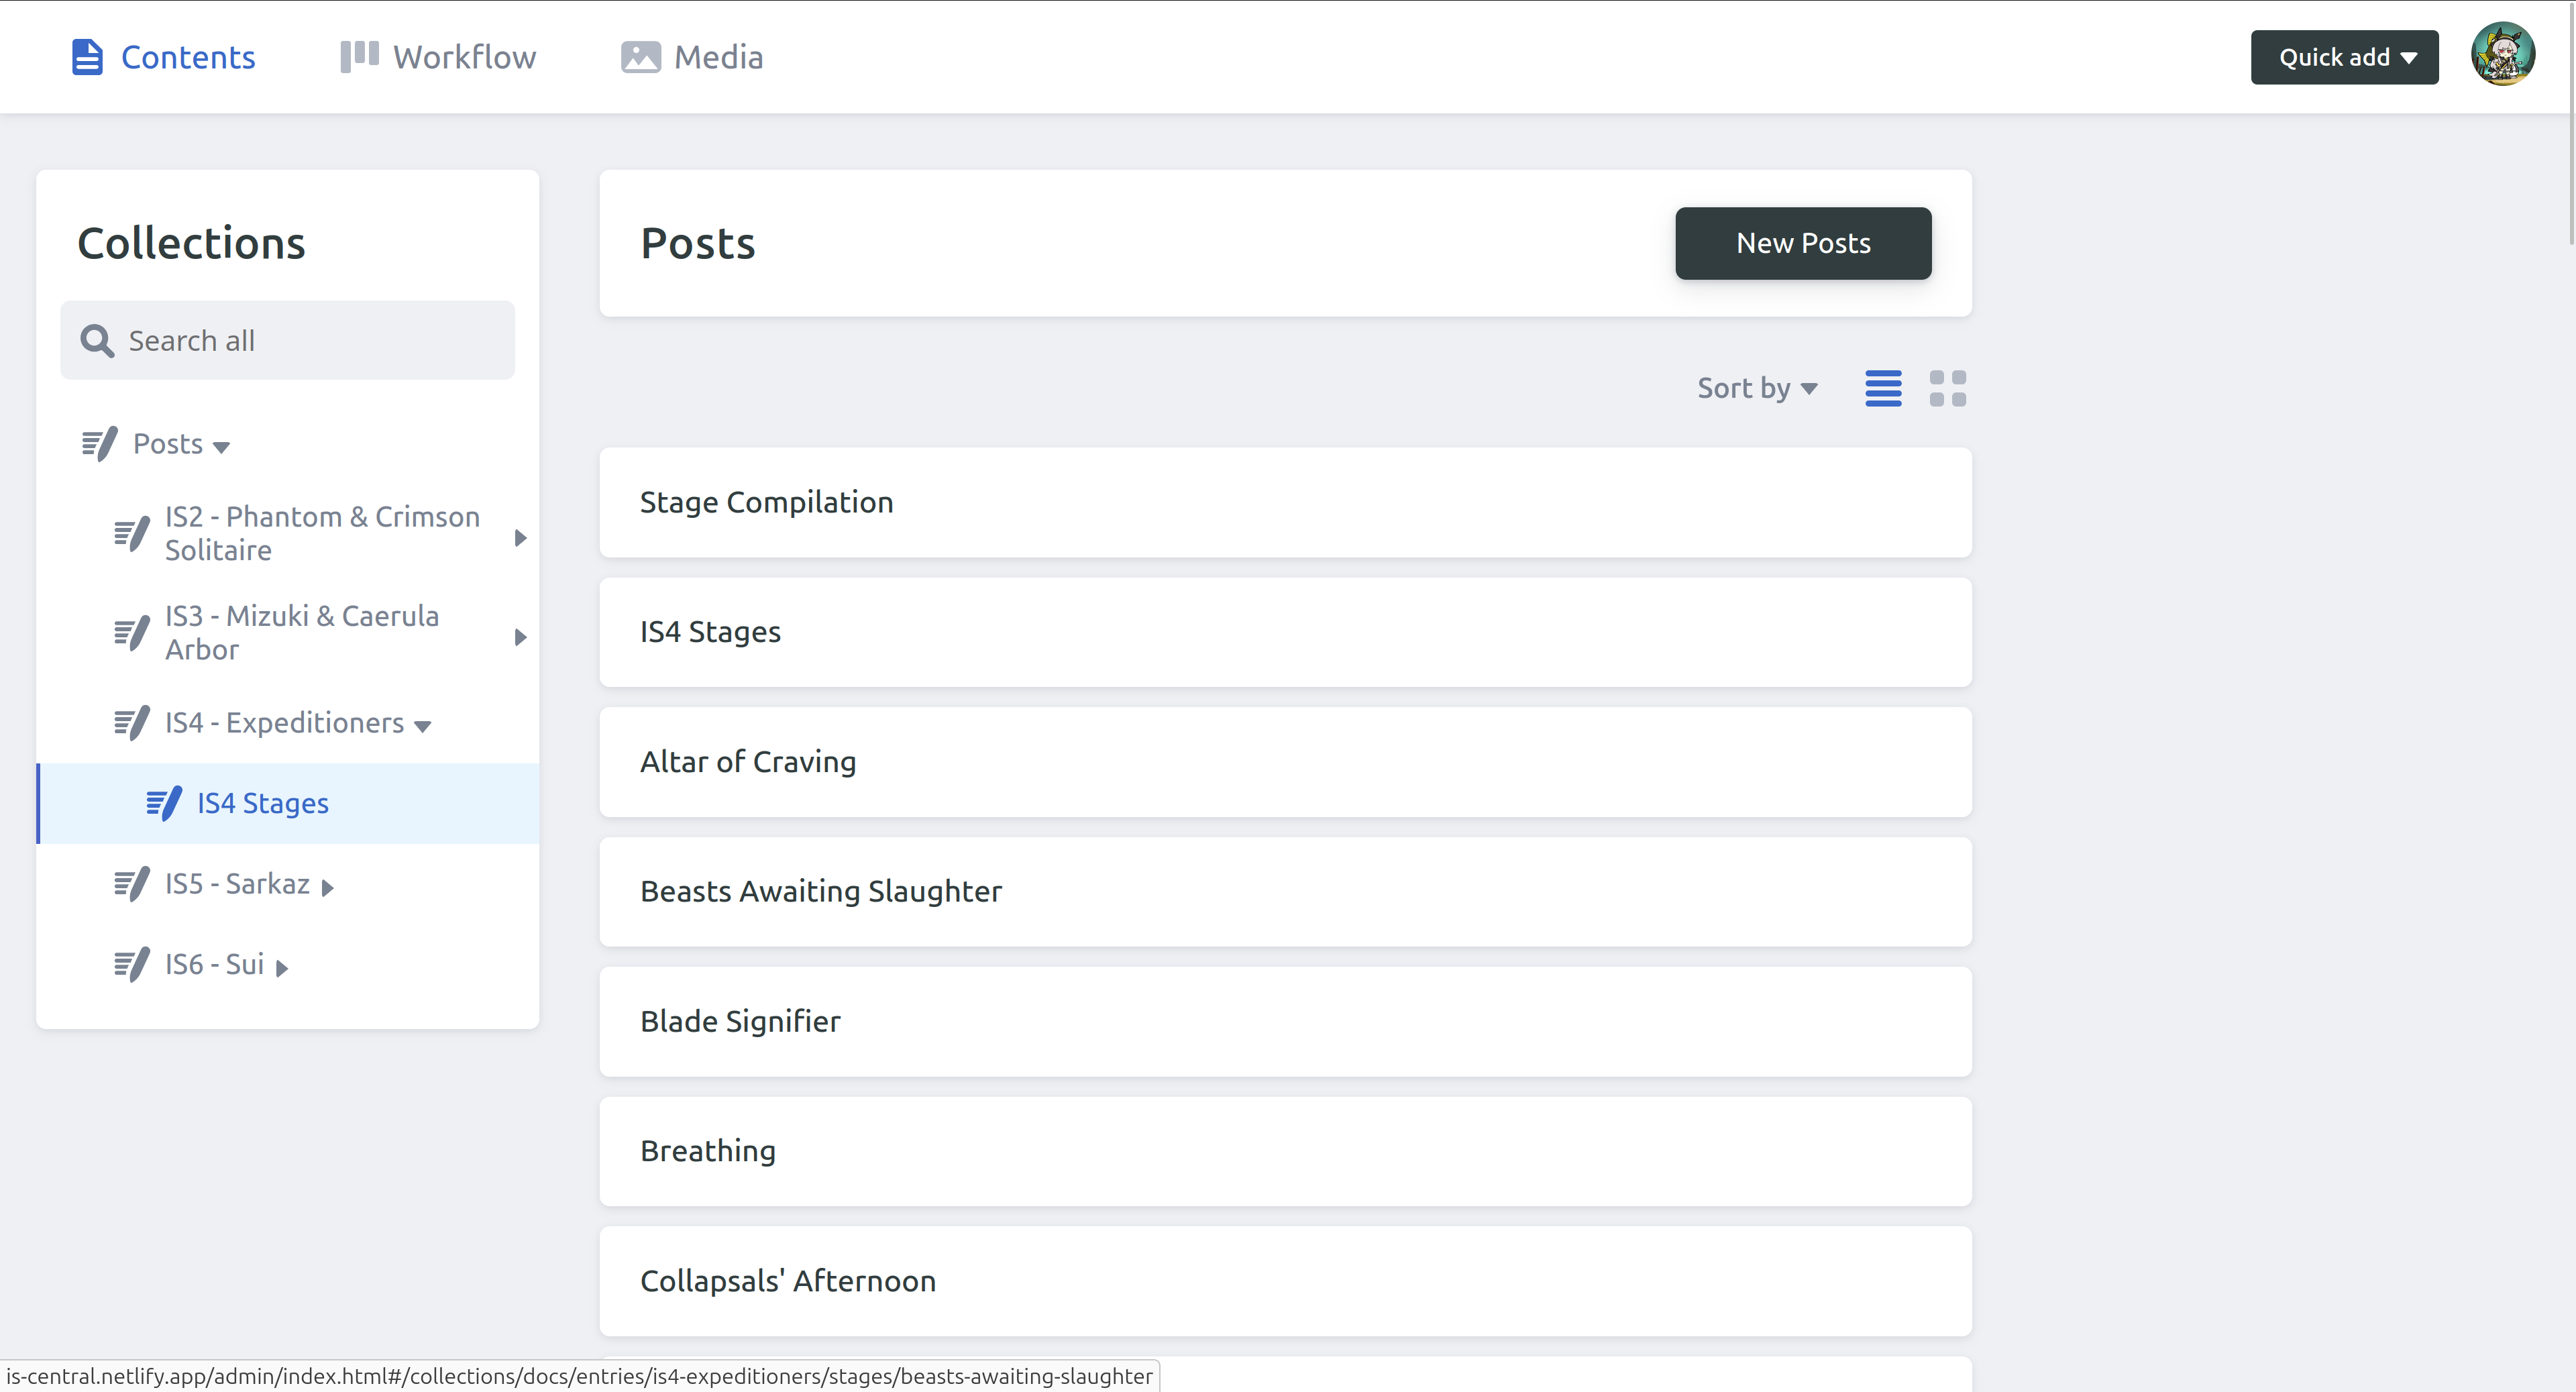
For this example I’ll be editing the guide for Beasts Awaiting Slaughter (an IS4 stage).
You can toggle between Rich text (like a Google Doc) and Markdown (like Discord). Markdown is generally preferred. You can also toggle between hide/show preview with the eye icon.
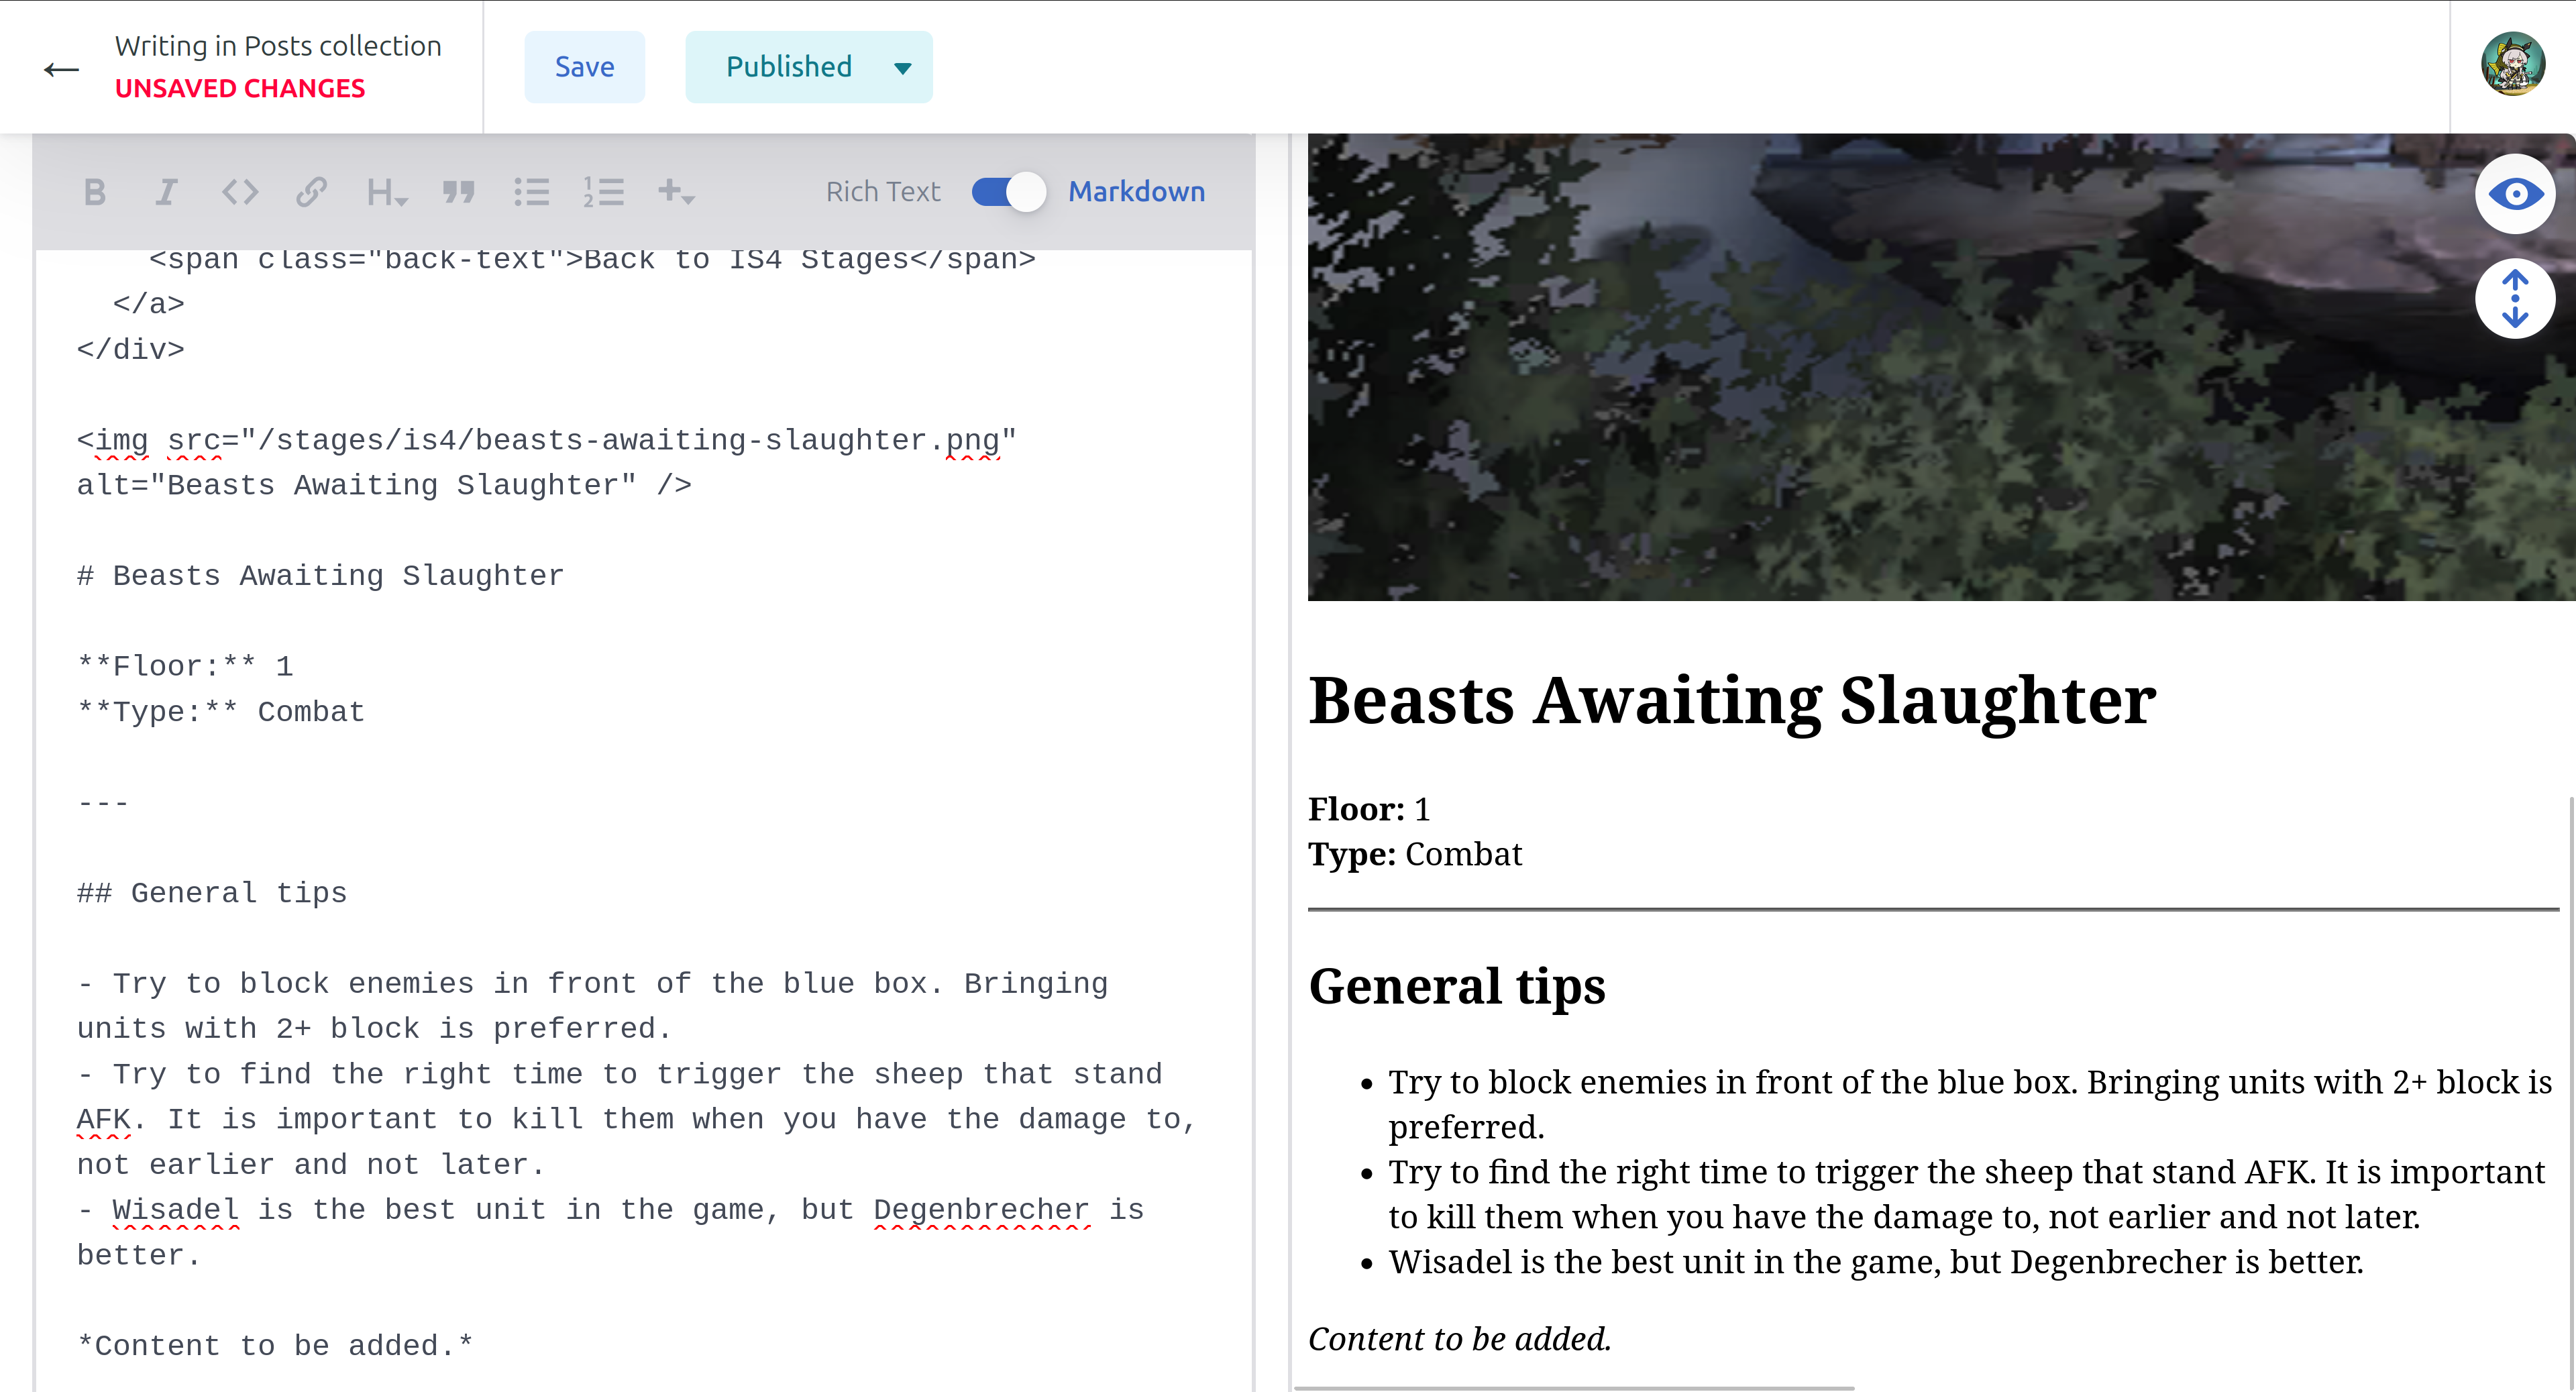
Start writing your guide below the --- lines. The preview bar isn’t a perfect match for what it would look like on the sight, but it is fairly close.
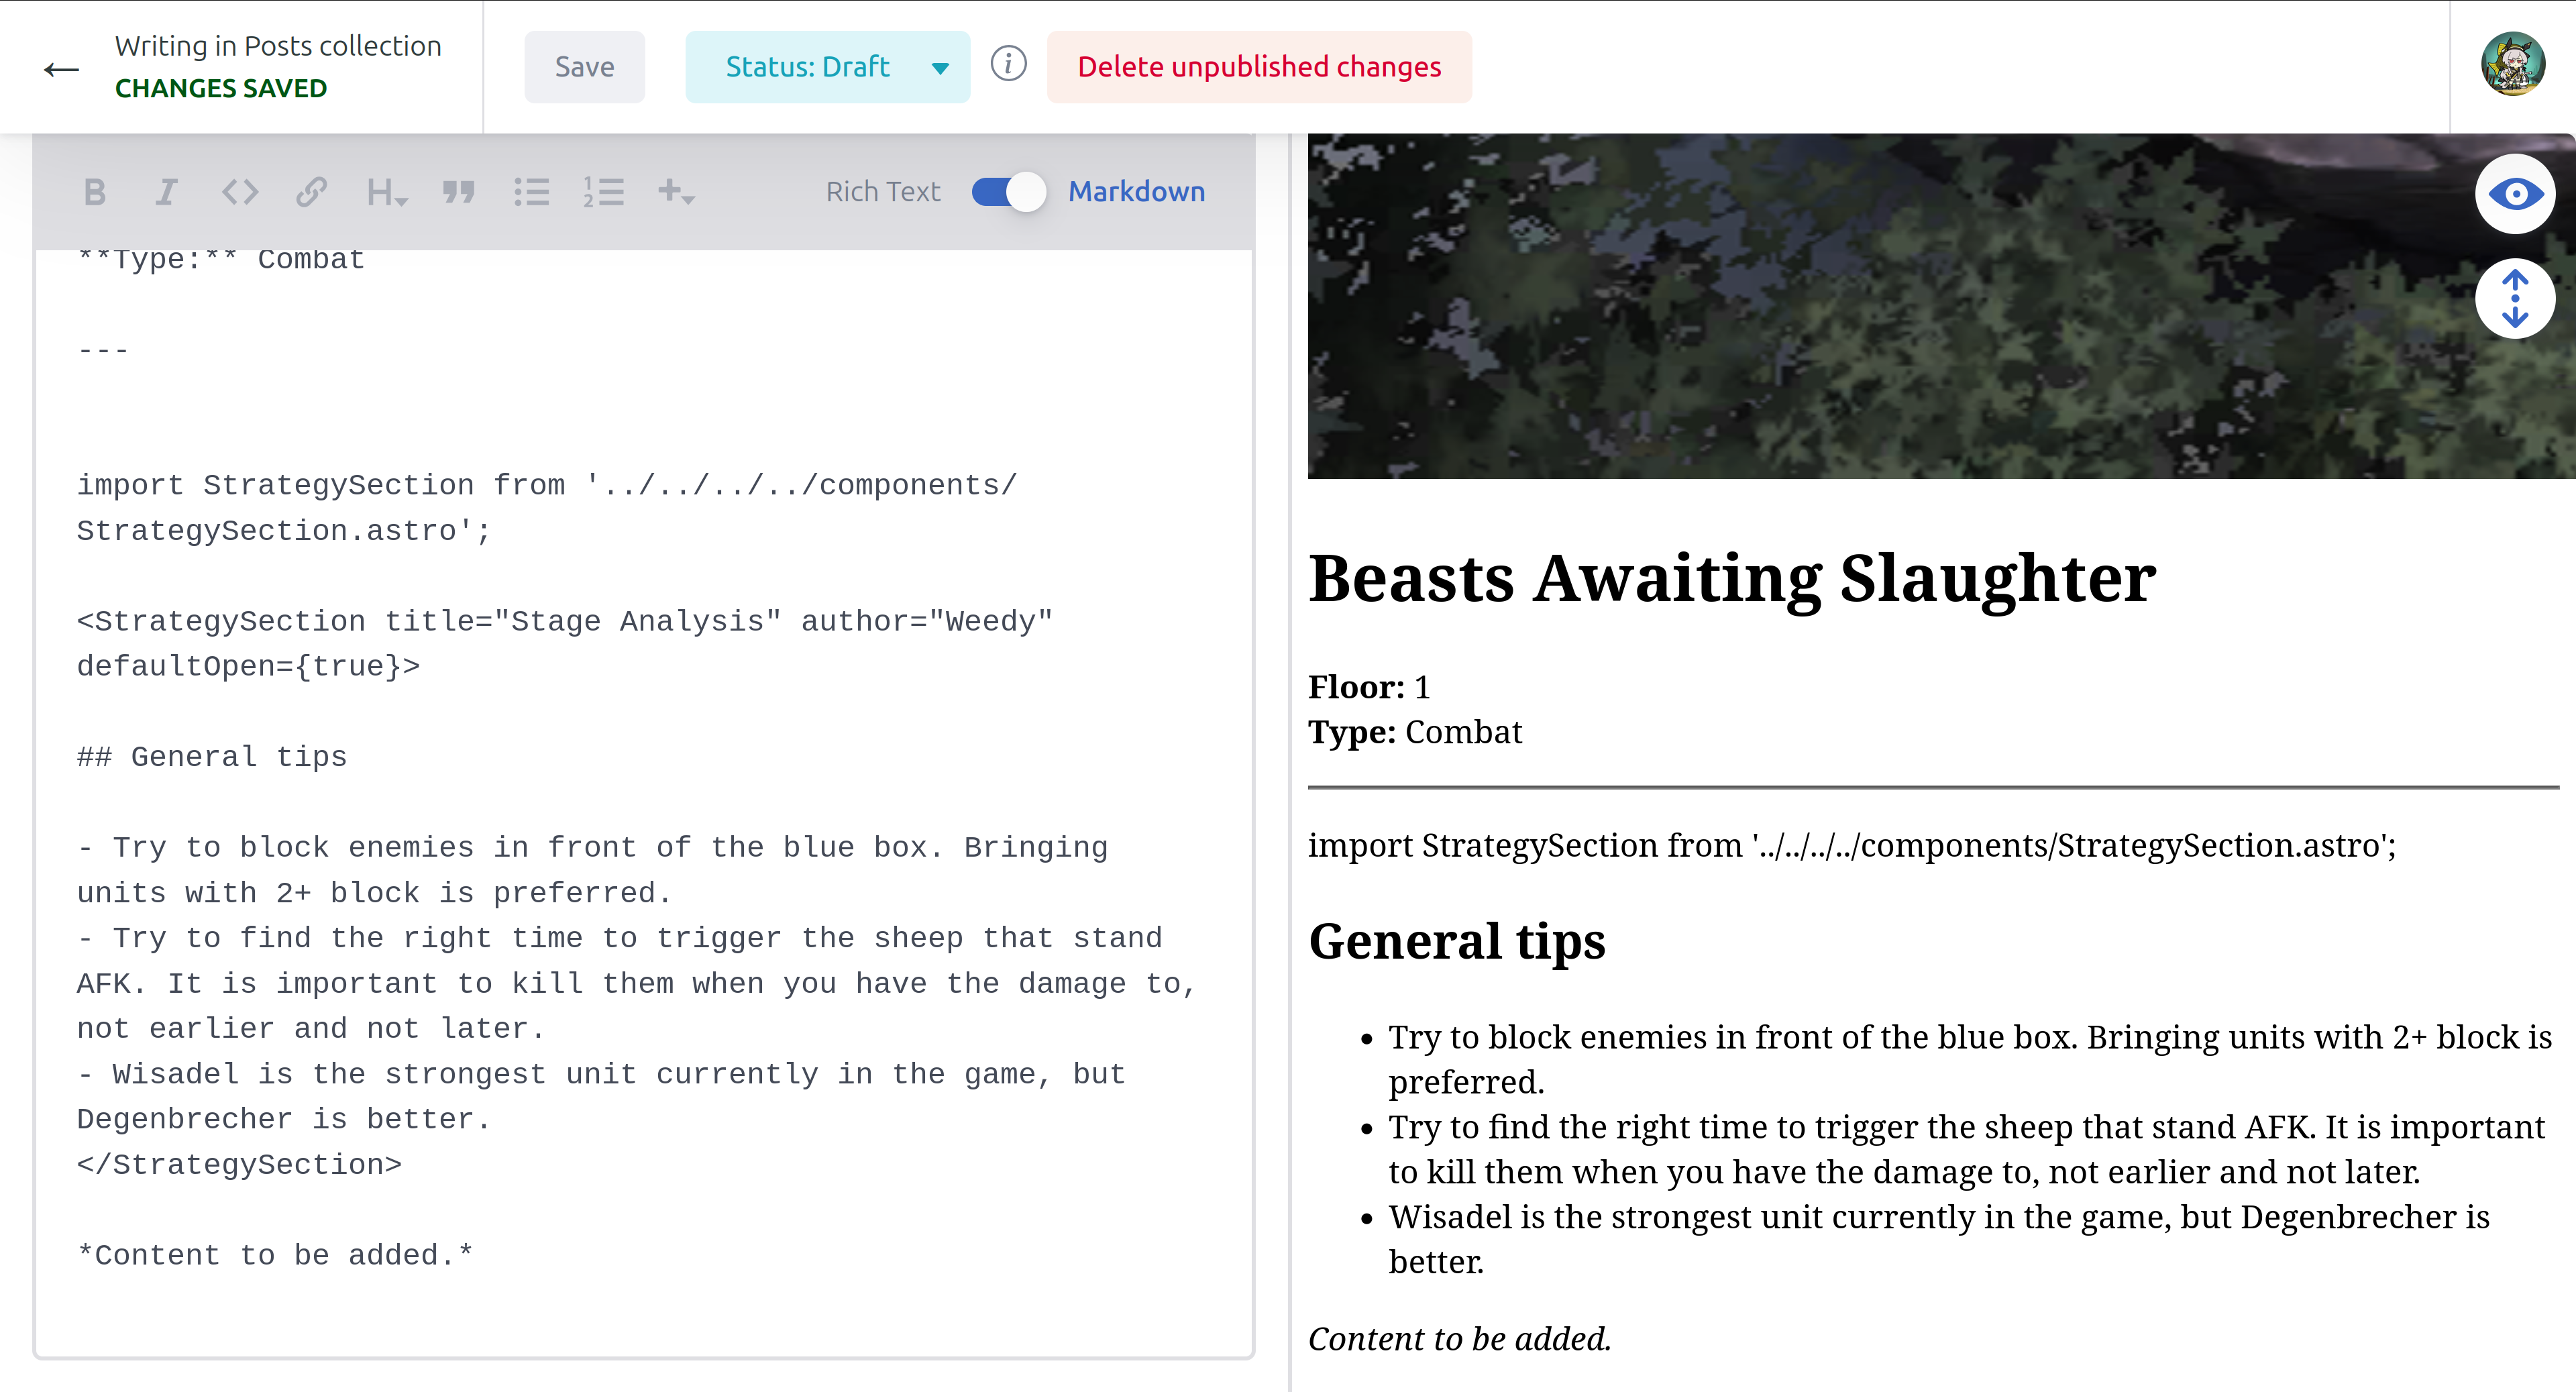
When you are done, paste this code block in
import StrategySection from '../../../../components/StrategySection.astro';
<StrategySection title="Stage Analysis" author="Your Name" defaultOpen={true}>// Your guide here</StrategySection>
and copy the content of your guide into where the //your guide here is.
Edit the title (currently "Stage Analysis") and the author (currently "Your Name") if needed.
Then click Save. If all goes right, a green popup indicated Entry Saved should appear.
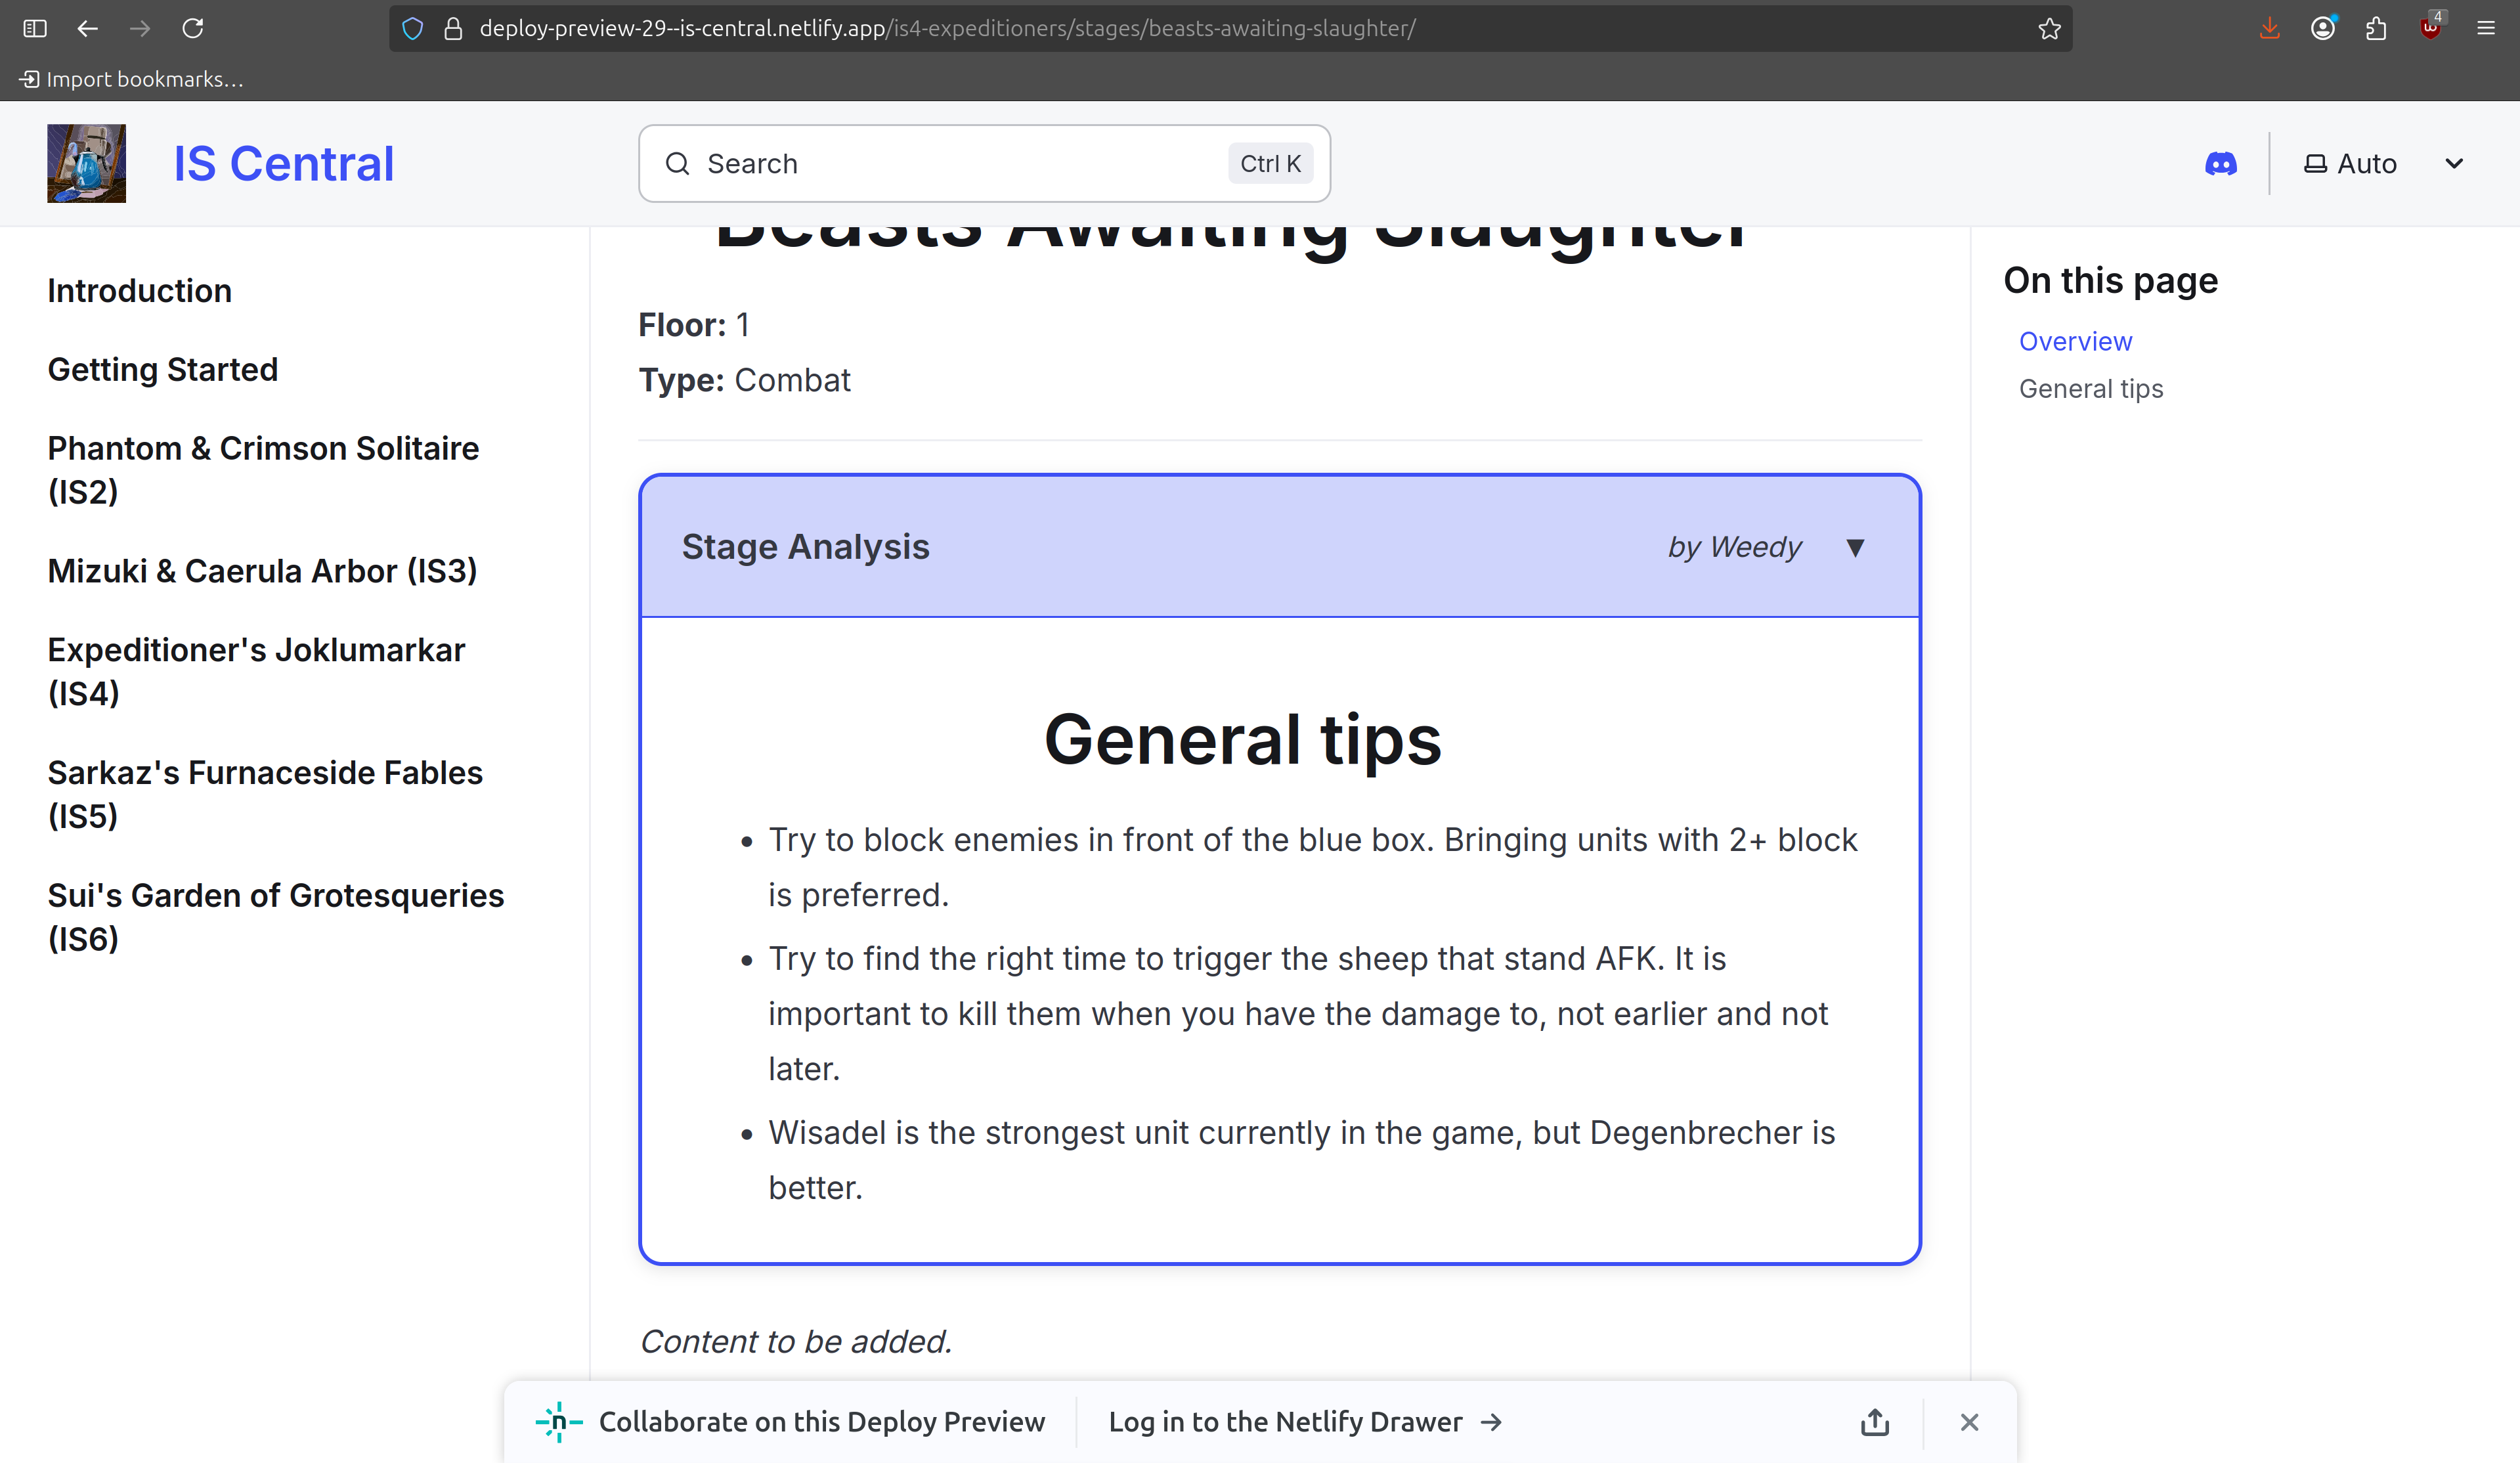
If you wait a bit a refresh, there should be a preview site in the upper right. You can click it to get a preview of what the actual site will look like. We can navigate on that site to our Beasts stage guide page.
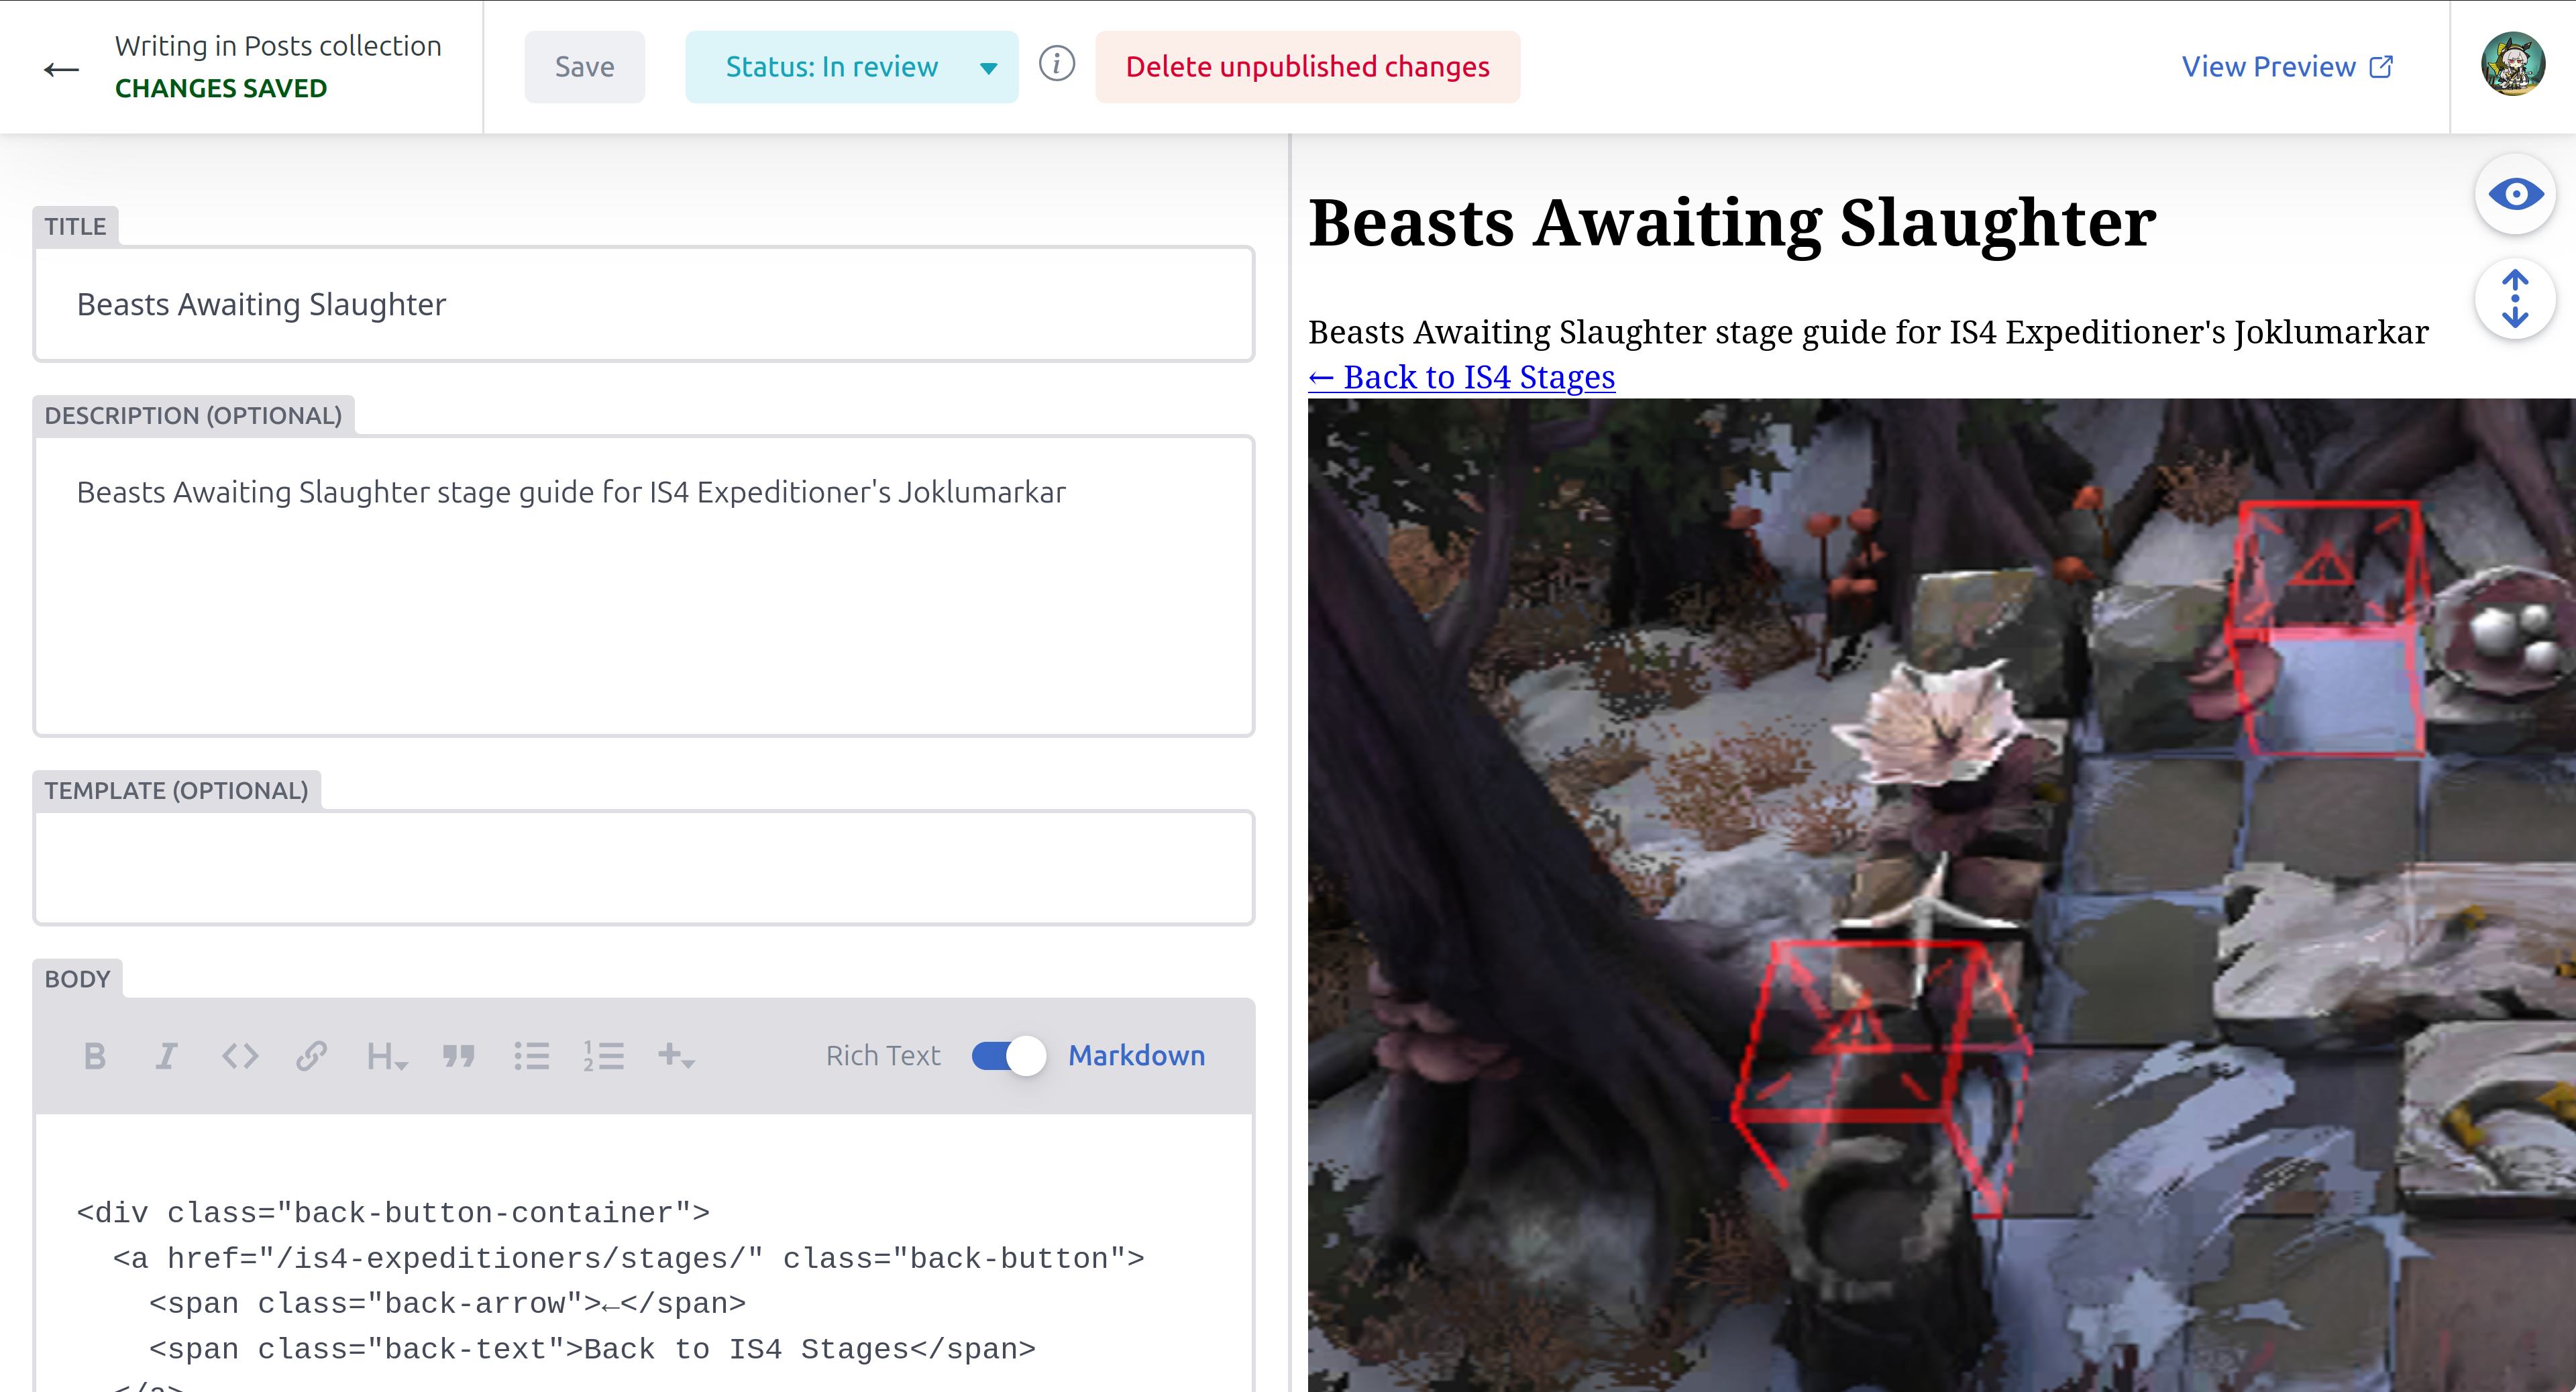
If you want to indicate that your draft is ready to be reviewed, you can change the status from Draft to In Review. From there, the maintainers will choose to (hopefully) accept your edits and add your guide to the main site.
The preview site should start generating as soon as you click Save for the time, so there is no need to rush the post to In Review.
You can view your current posts in the Workflow tab and upload media in the Media tab. Happy guide writing!
For admins
Section titled “For admins”There is a Publish button should never be used. It can force push to main, which is not preferred over the standard style of making a PR. There is work being put to disabling that button.
Adding a new stage guide with Github
Section titled “Adding a new stage guide with Github”First, go to the IS Central GitHub repository and fork the repository.
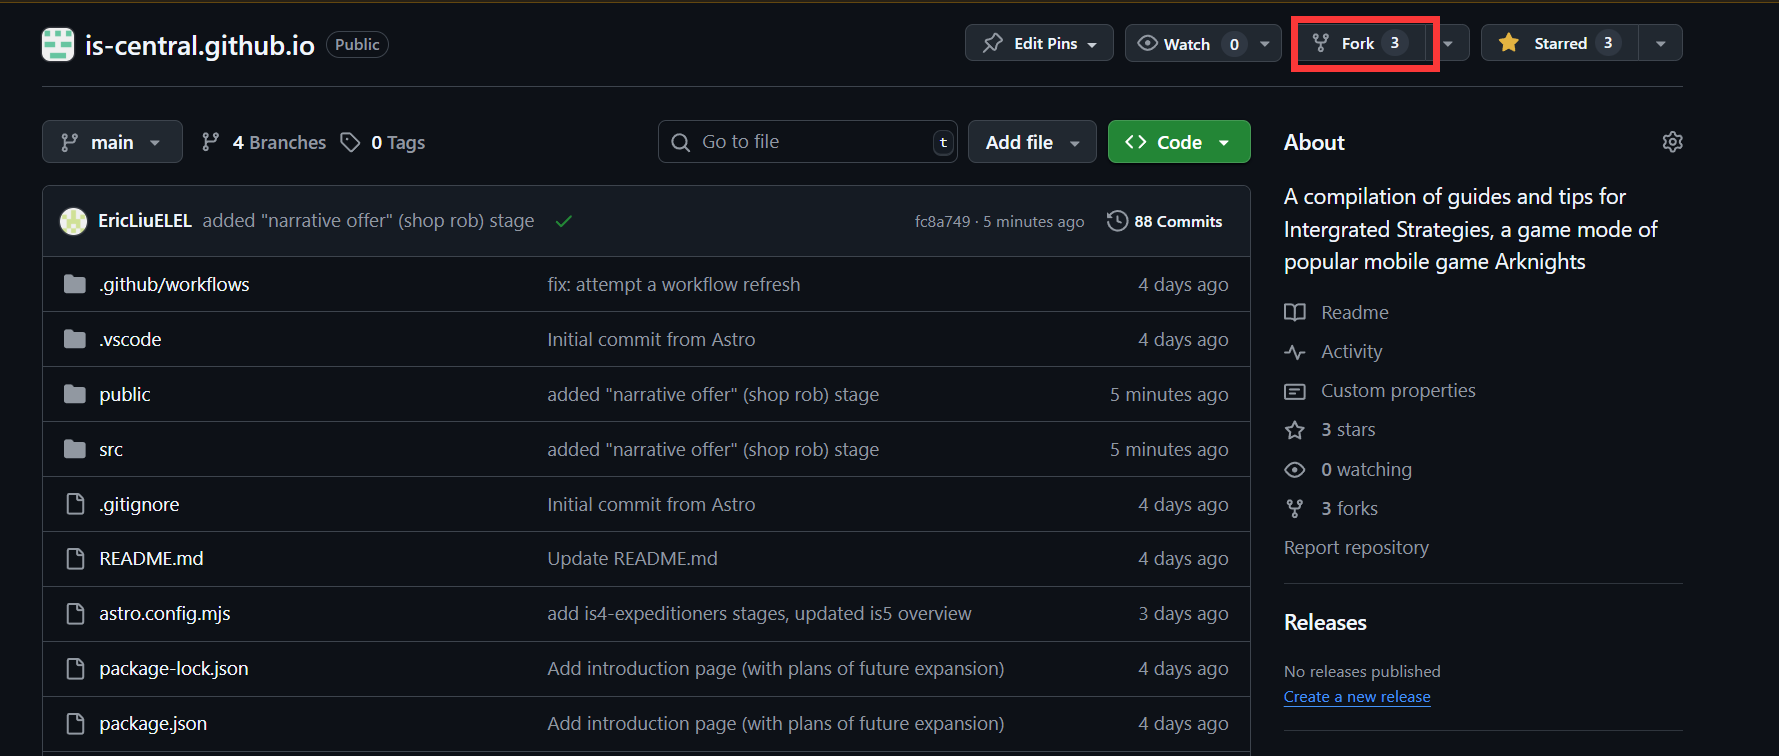
You can simply click the “Create fork” button.
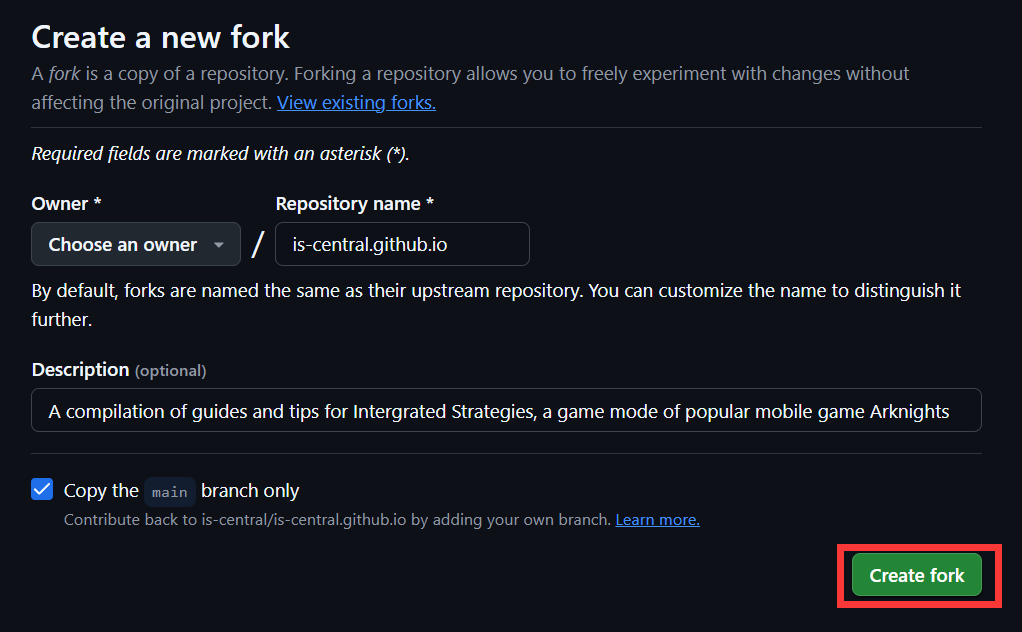
Now you have a copy of the repository on your own GitHub account, modifying the files in your fork will not affect the original repository.
Navigate to the src/content/docs/ directory and you will see a list of all the guides.

I’ll be using stage guides for IS5-Sarkaz as an example.
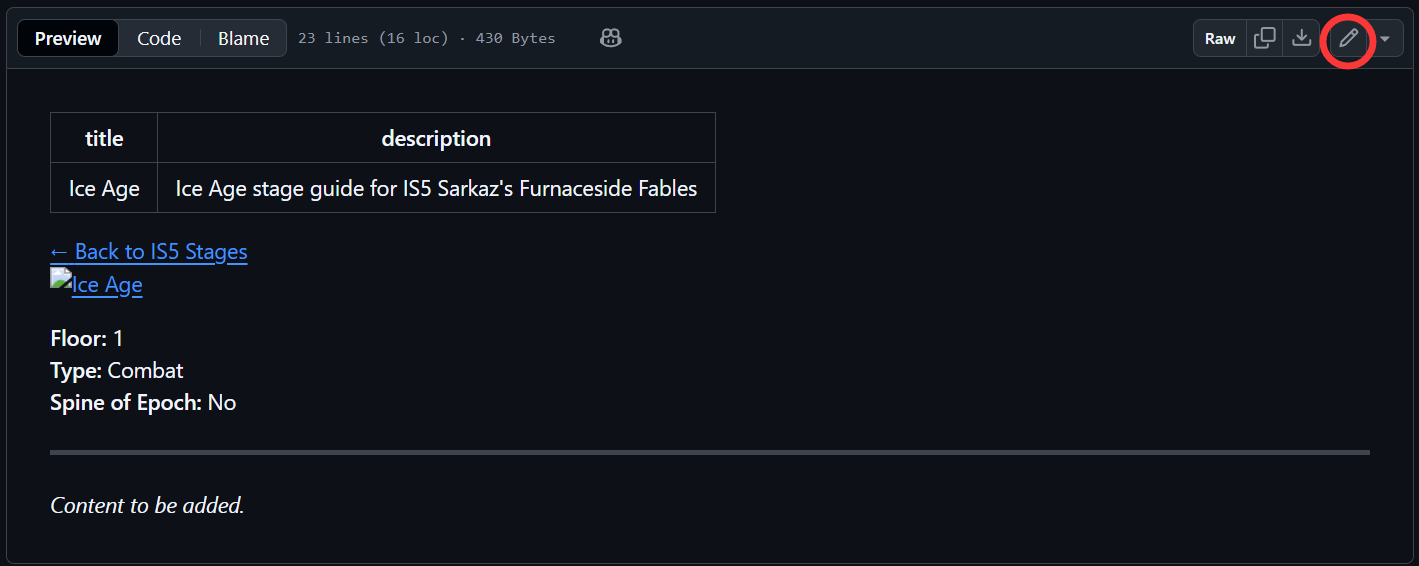
Navigate to the src/content/docs/is5-sarkaz/stages/ directory and you will see a list of all the stage guides, click on the one you want to edit.
Here, I’ll be editing the ice-age.mdx file. Which is the file for the stage “Ice Age”. Go ahead and click on pencil icon to edit the file.
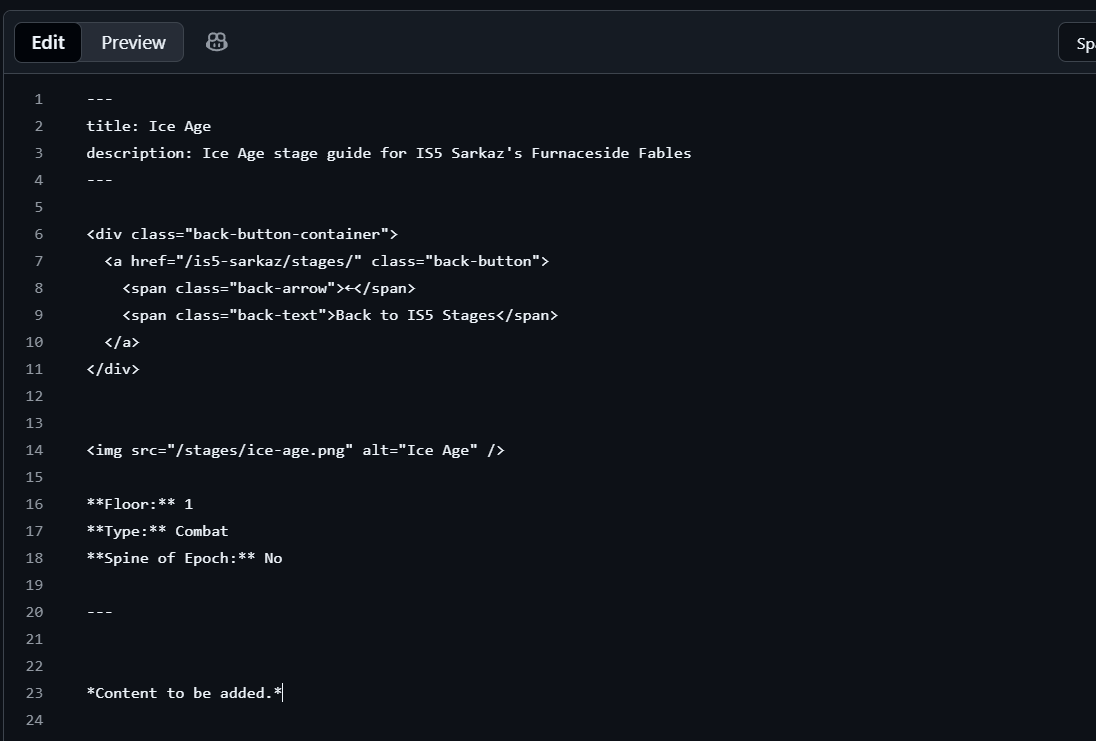
Woah! Code! Don’t worry, you don’t need to know how to code to contribute to the website.
The code is written in markdown, which is a simple markup language for writing text.
You can learn more about markdown here.
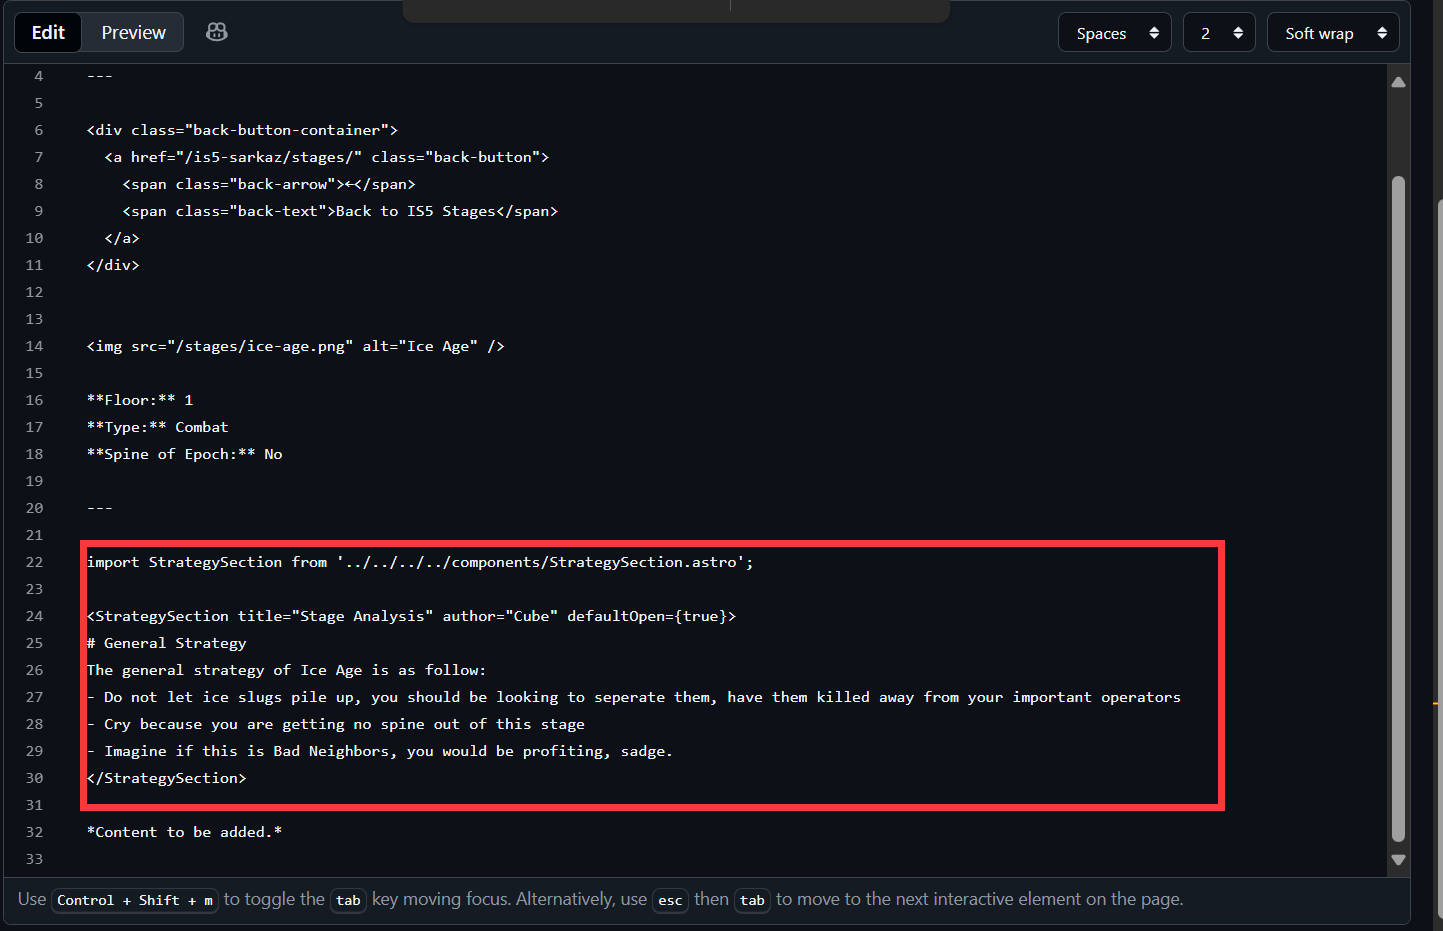
Write your guide in markdown format, after you’re done, first paste this code block into the file:
import StrategySection from '../../../../components/StrategySection.astro';
<StrategySection title="Stage Analysis" author="Your Name" defaultOpen={true}>// Your guide here</StrategySection>
Now, paste your guide in between the <StrategySection> tags. Edit the title and author to your liking. If you prefer to have the guide open by default, set defaultOpen to true.
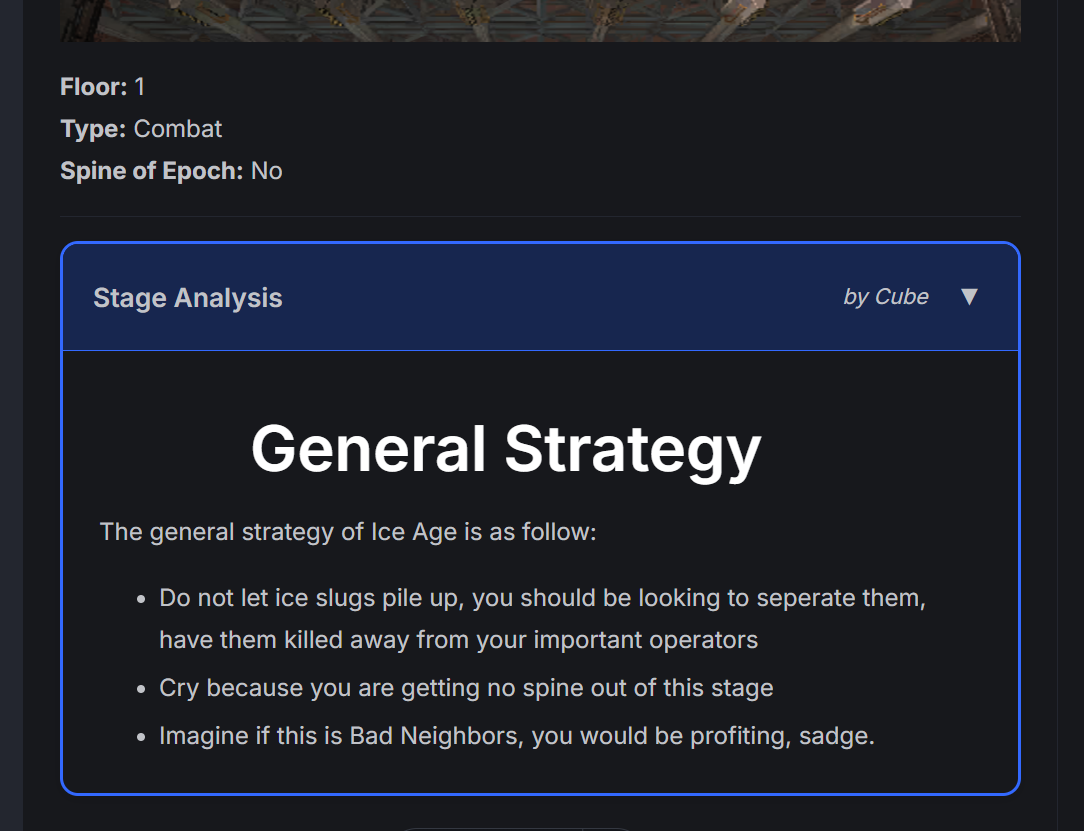
It should look like this:
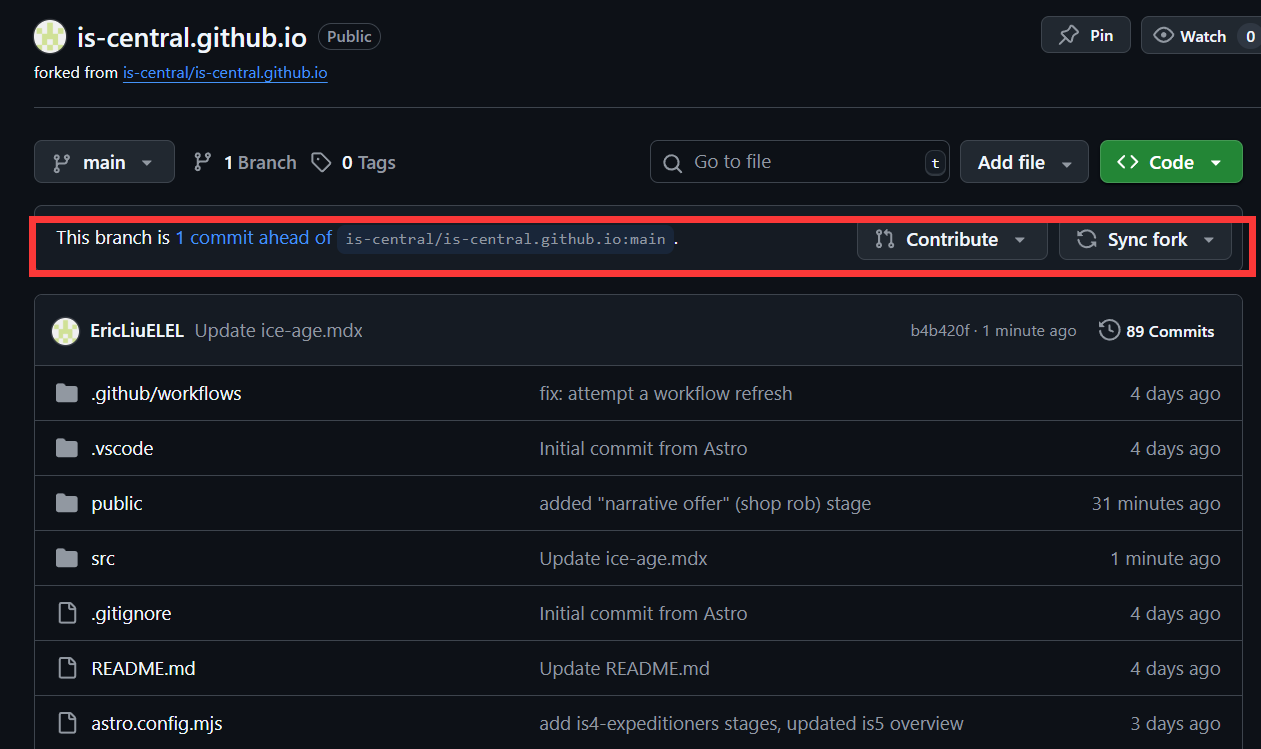
After you’re done, click on the “Commit changes” button at the upper right corner. Leave all the fields as is, and click on the “Commit changes” button.
Now, you can submit a pull request to the original repository. Go back to your forked repository:
Click on the “Contribute” button, and click on the “Open pull request” button. Add any description you want, and click on the “Create pull request” button.
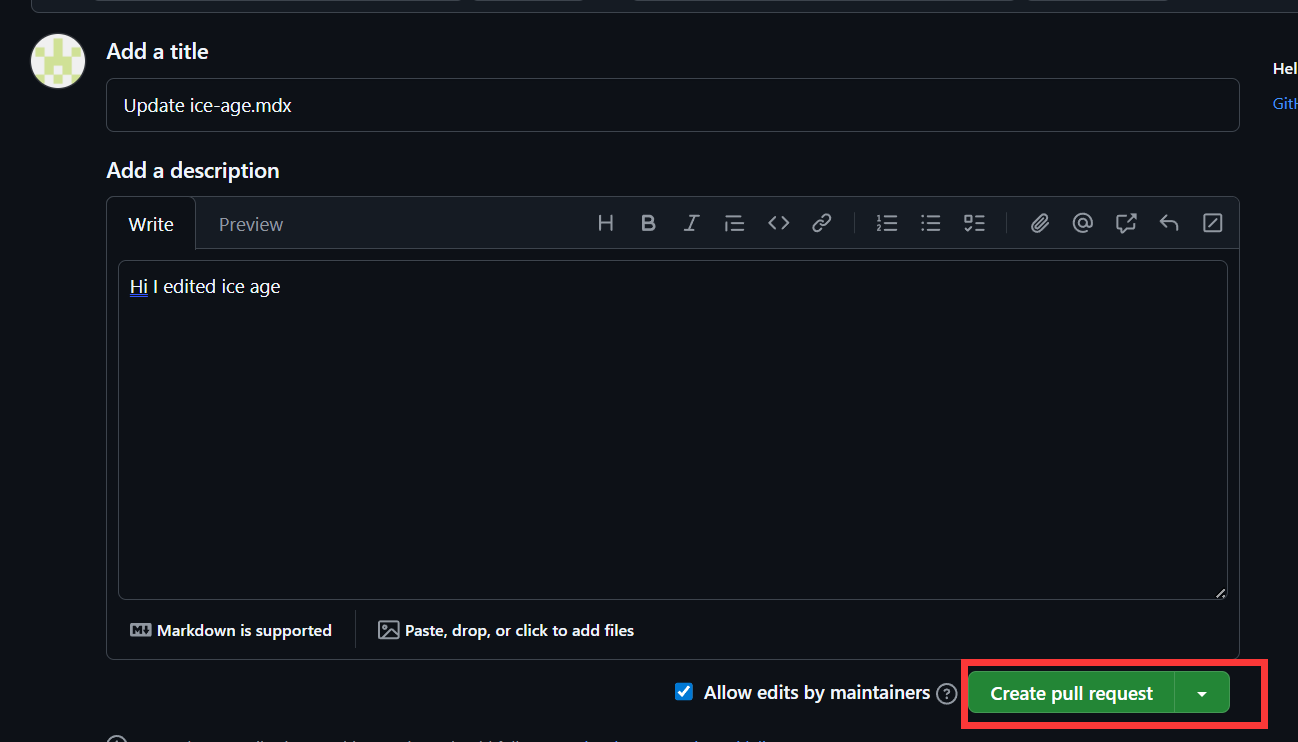
Now, you’ve submitted your pull request! You can now wait for the pull request to be merged, and your guide will be live on the website.